Wall art can instantly transform any room, giving it personality and style. Making your DIY wall art doesn’t have to be expensive or complicated. Here are a few easy, stylish wall art ideas that will fit any theme or decor style without breaking the bank.
1. Painted Canvas Panels
Create a gallery-like effect with a set of painted canvas panels in complementary colors or patterns.
Instructions: Tape off sections on each canvas to create geometric patterns or abstract shapes. Paint each section with different colors that match your room’s theme. Once dry, hang the canvases in a row or as a cluster.
2. Framed Fabric Art
Add some texture and color with framed fabric pieces. This works especially well with leftover fabric or scarves.
Fabric (leftover, patterned fabric pieces or swatches)
Instructions: Cut fabric pieces to fit the frames, place them inside, and hang them as a gallery wall. For a cohesive look, choose a color theme or mix patterns for an eclectic style.
3. Minimalist Line Art
Make trendy, minimalist line art that complements any modern or Scandinavian decor.
Materials Needed:
Canvas or sturdy paper
Black acrylic paint or marker
Pencil for sketching
Instructions: Lightly sketch a design on your canvas or paper, then go over it with a marker or black paint. Choose abstract faces, plant outlines, or simple geometric designs. Once done, frame or hang the piece directly.
4. Pressed Flower Frames
Give your room a touch of nature with beautiful pressed flower art.
Instructions: Arrange pressed flowers between two glass panes in the frame. Use a dab of glue if needed to keep them in place. These frames work beautifully with neutral, bohemian, or nature-inspired decor themes.
5. Photo Collage Wall
Use your favorite photos to create a wall full of memories that adds a personal touch to your space.
Instructions: Print your favorite photos in black-and-white or color. Arrange them in frames on your wall or hang them using clips on a string for a casual look.
6. Wallpaper or Stencil Art Panels
Make panels that look like wallpaper but are easier to customize or replace.
Instructions: Cut wallpaper to fit canvas boards or frames, or use stencils to create a painted pattern. Arrange the panels in sets for a unified look.
7. Handwritten Quotes
For a meaningful, simple DIY project, create wall art with your favorite quotes.
Instructions: Write a quote in your best handwriting or print it and trace it. This idea works well in bedrooms or offices, giving you a daily dose of motivation.
8. Drip Paint Art
Get creative with colors and make an abstract drip art piece that adds a pop of color to any room.
Instructions: Water down your paints slightly, then pour them along the top edge of the canvas and let them drip down. Experiment with different colors and see how they mix.
Benefits of DIY Wall Art
Creating your own wall art is not only budget-friendly but also allows you to make something unique that truly reflects your personality. Plus, DIY projects can be a relaxing and fulfilling way to spend time while enhancing your living space.
With these ideas, you can add a stylish, personal touch to your home, no matter your decor theme!
Decluttering is more than just a chore; it is an essential practice that contributes significantly to creating a clean and organized home environment. The psychological benefits of maintaining a tidy space are well-documented. A clutter-free environment fosters clarity of mind and promotes a sense of calm, reducing feelings of stress and anxiety. When our surroundings are orderly, it becomes easier for us to focus on tasks at hand, enhancing overall productivity. With these Declutter Hacks, you’ll create a connection between physical spaces and mental well-being.
Declutter Hacks: Quick Tips for a Cleaner, Tidier Home
Transitioning to a decluttered space does not necessitate hours of effort; small, incremental changes can create a significant impact. Allocating just five minutes daily to declutter a specific area can gradually lead to more manageable and less chaotic environments. Such a simple commitment encourages the habit of organization without overwhelming individuals with the thought of an extensive clean-up process. Ultimately, embracing the practice of decluttering serves as a vital step toward fostering a harmonious living space that promotes well-being and productivity.
5-Minute Declutter Hacks for Each Room
When it comes to maintaining a cleaner home, strategic decluttering hacks can make a significant difference, especially when time is of the essence. Here are some practical tips tailored for specific rooms in your house that can be accomplished in just five minutes.
Living Room: One effective way to enhance organization is to utilize decorative baskets. Place a couple of stylish baskets around the living room to quickly gather items that tend to accumulate, like magazines, remote controls, or toys. In just five minutes, you can empty surfaces and create a more organized environment. Additionally, consider designating a specific spot for each item; this ensures that everything has a place, simplifying future decluttering sessions.
Kitchen: Kitchen drawers often become chaotic; however, a quick solution is to sort through utensils. Spend five minutes pulling out everything and categorizing items into groups such as cooking tools, serving spoons, and miscellaneous gadgets. Discard duplicates or items that you no longer use, and consolidate similar items in one drawer to streamline your kitchen’s functionality.
Bathroom: To refresh your bathroom space, dedicate five minutes to clearing countertops. Start by putting away toiletries that have a permanent home, and use a small basket for everyday essentials, making them easily accessible yet organized. After decluttering surfaces, consider cleaning out your medicine cabinet, discarding expired products and toiletries you no longer need.
Bedroom: In the bedroom, a quick and effective hack is to spend five minutes sorting through your dresser. Pull out clothing that you have not worn in the last season and put it in a donation bag. This not only frees up valuable drawer space but also creates a more tranquil environment conducive to relaxation and rest.
By implementing these five-minute declutter hacks in each room of your home, you can cultivate a habit that contributes to a cleaner and more organized living environment overall.
Creative Storage Solutions for Small Spaces
Living in smaller homes or apartments often presents unique challenges when it comes to organization. However, with creative storage solutions, it is possible to maximize every square inch of space while maintaining an appealing aesthetic. One of the most effective techniques is to utilize vertical space. By installing shelves that reach the ceiling or using tall bookcases, homeowners can draw the eye upwards, creating an illusion of a larger area while providing ample storage for books, decorative items, or even indoor plants.
Declutter Hacks small apartment
Additionally, multi-functional furniture can significantly enhance space efficiency. Items such as ottomans with hidden compartments, coffee tables that double as storage chests, or beds with built-in drawers allow for the careful concealment of items that would otherwise clutter living areas. This furniture serves dual purposes, negating the need for extra storage units and helping to maintain a streamlined look in smaller rooms.
Incorporating hidden storage compartments is another innovative strategy. Consider furniture pieces that serve a concealed role, such as wall-mounted cabinets,under-stair drawers, or foldable desks that can be tucked away when not in use. These solutions not only keep belongings organized but also help to reduce visual clutter. For example, hidden storage in furniture can blend seamlessly with the design, preventing the space from feeling cramped.
Declutter Hacks: Creative Storage Solutions for a More Functional Home”
Encouraging readers to think outside the box is essential when it comes to creative storage solutions. From installing pegboards in the kitchen for lightweight tools to utilizing nesting tables that can be tucked away, there are numerous options that can be tailored to personal preferences and needs. Implementing these effective storage strategies can lead to a more organized and functional living environment.
Hidden Organization Tips:
Out of Sight, Out of Clutter
Maintaining a cleaner home often requires innovative strategies that prioritize organization while keeping everyday items out of sight. Utilizing boxes, bins, and drawers offers a practical solution for decluttering spaces. These containers can effectively conceal items that typically contribute to visual chaos, such as toys, books, and everyday electronics. Selecting aesthetically pleasing storage options that align with your home’s decor can enhance both functionality and visual appeal.
Moreover, adopting a labeling system adds an additional layer of organization. Clear labels on storage boxes or bins allow for quick identification of contents, streamlining the process of retrieving necessary items. This practice ensures that everything has a dedicated space, making it easier to maintain cleanliness. Furthermore, color coding labels can enhance this system, providing a visual guide that aids in immediate recognition and retrieval. For instance, designating specific colors for different categories such as “office supplies,” “craft materials,” or “seasonal decorations” can significantly expedite the organization process.
“Transform Your Space: Clever Hidden Storage Solutions for a Cleaner, More Organized Home”
Incorporating hidden organization methods not only creates a visually cleaner aesthetic but also encourages a more strategic approach to home management. For example, under-bed storage can be utilized for items such as shoes or out-of-season clothing, effectively using otherwise wasted space. Additionally, multi-functional furniture with built-in storage compartments can help further minimize clutter while serving practical purposes.
Conclusion
Implementing these tips allows individuals to curate a more peaceful living environment, emphasizing that cleanliness is not just about surface-level tidiness. Instead, it reflects a thoughtfully organized space where every item is efficiently stored, contributing to the overall ambiance of the home.
As autumn’s crisp air settles in, there’s something deeply comforting about transforming your space to reflect the season’s cozy essence. Whether it’s layering soft throws or adding earth-toned accents, these 10 warm fall decor ideas can create a cozy haven in your home without needing a complete makeover.
1. Layered Blankets and Throws
Why it warms up your space: Nothing feels more inviting than layers of soft blankets in rich colors. Drape a cozy plaid or a cable-knit throw over the couch for that “come, sit and relax” vibe.
2. Candles for Soft Ambience
Why it works:Candles in fall scents, like cinnamon or cedarwood, evoke warmth and tranquility. Arrange them in groups on tables or mantels for an effortless, rustic charm.
3. Earth-Toned Pillows and Cushions
Why it matters: Rich earth tones like mustard, rust, and burnt orange bring autumn’s beauty inside. By simply switching out pillows, you can add a pop of fall color that’s visually warming.
4. Mini Pumpkins and Gourds
Why it’s essential: Pumpkins are classic autumn decor. Arrange small white, green, or orange pumpkins along a table or windowsill to add a simple, natural touch.
5. Rustic Storage Baskets
Why it helps: Baskets made of woven materials like wicker or seagrass add texture and warmth. Use them to store blankets or magazines for both practicality and a rustic aesthetic.
6. Autumnal Wreaths
Why it brings warmth:Wreaths made from leaves, pinecones, and dried flowers are a timeless way to welcome guests and bring nature indoors.
7. Aromatherapy and Essential Oils
Why it works: Scents can transform your home. Essential oils like pumpkin spice or clove not only enhance ambiance but also trigger memories of autumn comforts.
8. Fairy Lights for a Magical Glow
Why it feels magical:Fairy lights give off a warm, inviting glow perfect for cozy nights in. Hang them along a window or wrap them around plants for a charming touch.
9. Plaid and Flannel Patterns
Why it brings nostalgia: Plaid and flannel are autumn staples that evoke a classic, rustic feel. Consider plaid table runners, napkins, or a flannel throw to add a familiar warmth.
10. Wood Accents and Vintage Books
Why it creates comfort:Wood brings an organic feel, while vintage books add character. Place a few stacked books on a coffee table for a touch of cozy nostalgia.
Looking to refresh your space without spending a fortune? Small changes can make a big difference when it comes to home decor! Here’s a guide to affordable home makeover tips that can instantly elevate your rooms, using budget-friendly items, a few DIY projects, and some clever decor swaps.
” Heartwarming Affordable Home Decor Ideas on a Minimal Budget”
1. Rearrange and Declutter
Starting with the basics can work wonders.
Tip: Rearranging your furniture and decluttering gives the room a fresh feel without any cost. Try positioning pieces in a new layout to open up space and create a different flow. Declutter countertops and organize shelves to make the room feel more spacious.
2. Add a Fresh Coat of Paint
Paint can change the look of a room in hours.
Tip: Choose an accent wall in a bold color or soft neutral to bring warmth or vibrancy. Small paint projects, like refreshing trims, doors, or even furniture, can add character without breaking the bank. A $20 can of paint can make all the difference!
Tip: Consider adding a pattern to a blank wall, the back of a bookshelf, or even a small accent wall. The peel-and-stick option makes it easy to remove if you want to change the look down the road.
4. Incorporate More Lighting
Lighting changes everything.
Tip: Swap out old lightbulbs with warmer or brighter tones, depending on the room’s purpose. Floor lamps, fairy lights, and even candles can add ambiance. If you’re able to hang new light fixtures, opt for modern pendant lights that suit your style.
5. Bring in Some Greenery
Plants add life to any room.
Tip: Real or faux, plants give a fresh look. Easy-care plants like snake plants, succulents, or pothos add color and texture. Arrange a few around the room, either on shelves, the floor, or windowsills.
6. Update Hardware
Small details, big impact.
Tip: Swap out cabinet knobs, drawer pulls, or even light switch covers for an updated look. Metallics like brass, gold, or matte black are currently trendy and give an elegant, modern touch to older furniture or fixtures.
7. Invest in Multi-Functional Furniture
Great for small spaces and tight budgets.
Tip: Look for pieces like ottomans that double as storage, foldable desks, or convertible sofas. Multi-functional items reduce clutter while maximizing utility.
8. Layer Rugs for Texture and Warmth
Create a cozy feel with this simple trick.
Tip: Layering a smaller, textured rug on top of a larger plain one adds depth to a room. This works well in living rooms or bedrooms, providing warmth and visual interest.
9. DIY Wall Art
Personalized art makes a space unique.
Tip: You don’t need to be an artist to create beautiful wall art. Try framing meaningful photos, creating a gallery wall, or crafting simple canvas art with painter’s tape and a couple of acrylic paints. You can also use thrifted frames and paint them to match your decor.
10. Repurpose What You Already Have
Get creative with items around the house.
Tip: Take a look at what’s lying around and find new ways to use them. For example, turn a wooden crate into a shelf, repurpose mason jars as vases, or stack old books for a rustic side table. This saves money and gives your decor a personal, eclectic touch.
Refreshing your home decor doesn’t have to be expensive. With these budget-friendly tips, you can give your home a stylish, updated look that’s uniquely yours. Try out a few ideas and see how even small changes can make a big impact! Your home should feel like a sanctuary, a space that radiates comfort and ease. With just a few strategic changes, you can transform your surroundings on a minimal budget, crafting a retreat that’s both stylish and serene.
The Best season to get crafty! Creating your own Christmas decorations can not only enhance your holiday spirit but also add a personal touch to your home. Here are ten fun DIY decoration ideas you can try this Christmas.
Let’s get started
1. Pine Cone Ornaments Collect pine cones from your yard or a local park. Paint them in festive colors, like red and green, and sprinkle glitter. Attach a ribbon for hanging. These natural ornaments add an earthy charm to your tree.
To create this DIY Decoration Idea with a festive and natural look, you’ll need:
Pine Cones – Gather from your yard or a local park. Look for ones that are fully opened and dry.
Acrylic Paint– Red, green, gold, or silver are great holiday colors.
Glitter – Choose a color that complements the paint for an extra sparkle effect.
Ribbon or Twine– For hanging the ornaments. Choose festive colors or natural twine for a rustic look.
Glue or Mod Podge– To help the glitter adhere to the pine cones.
Paint Brushes – For applying paint to the pine cones.
Hot Glue Gun (optional) – For securely attaching the ribbon to the pine cone.
Instructions:
Clean and Dry Pine Cones: Remove any dirt and ensure they’re dry.
Paint and Glitter: Apply a light coat of paint on the edges, then sprinkle glitter while the paint is wet or use glue.
Attach Ribbon: Hot glue a loop of ribbon or twine to the top for easy hanging.
2. Mason Jar Snow Globes Transform mason jars into whimsical snow globes! Fill each jar with water, glitter, and small Christmas figurines like trees or reindeer. Seal the lid tightly, and shake to make it snow!
To make Mason Jar Snow Globes, here’s what you’ll need:
Materials:
Mason Jars– Clear jars with tight-sealing lids. Any size works, but smaller jars create a classic snow globe effect.
Water – Distilled water is ideal to keep the jar clear over time.
Glycerin or Baby Oil – Optional, but helps the glitter fall more slowly, creating a snow effect.
Glitter – Choose fine glitter in white, silver, or holiday colors to simulate snow.
Paint or Ribbon (Optional) – For decorating the lid or adding a festive touch.
Instructions:
Glue Figurines to Lid: Securely attach the figurines to the inside of the lid with waterproof glue and allow it to dry completely.
Add Water, Glycerin, and Glitter: Fill the jar with water, add a few drops of glycerin, and a small amount of glitter.
Seal and Shake: Carefully screw the lid on tightly and shake to make it snow!
3. Salt Dough Ornaments Make salt dough using 2 cups flour, 1 cup salt, and 1 cup water. Shape it into festive ornaments and bake at 200°F until hard. Once cooled, paint your creations in holiday colors and hang them on the tree.
To create this DIY Decoration Idea you’ll need the following materials:
Materials:
Flour – 2 cups of all-purpose flour.
Salt – 1 cup of regular table salt.
Water – 1 cup to mix the dough.
Rolling Pin – For flattening the dough.
Cookie Cutters – In festive shapes like stars, trees, or gingerbread men.
Baking Sheet and Parchment Paper – For baking the ornaments.
A Straw or Toothpick – To make a hole at the top of each ornament for hanging.
Acrylic Paint – For decorating the ornaments once they are baked and cooled.
Paint Brushes – To apply paint details.
Ribbon or Twine – For hanging the ornaments on the tree.
Instructions:
Mix Dough: Combine the flour, salt, and water in a bowl until it forms a dough.
Roll and Cut Shapes: Roll out the dough and cut it into shapes with cookie cutters.
Make Holes for Hanging: Use a straw or toothpick to make a small hole at the top of each ornament.
Bake: Place on a baking sheet and bake at 200°F (93°C) for about 2-3 hours, or until completely hard.
Decorate: Once cooled, paint the ornaments in holiday colors, and thread ribbon or twine through the holes for hanging.
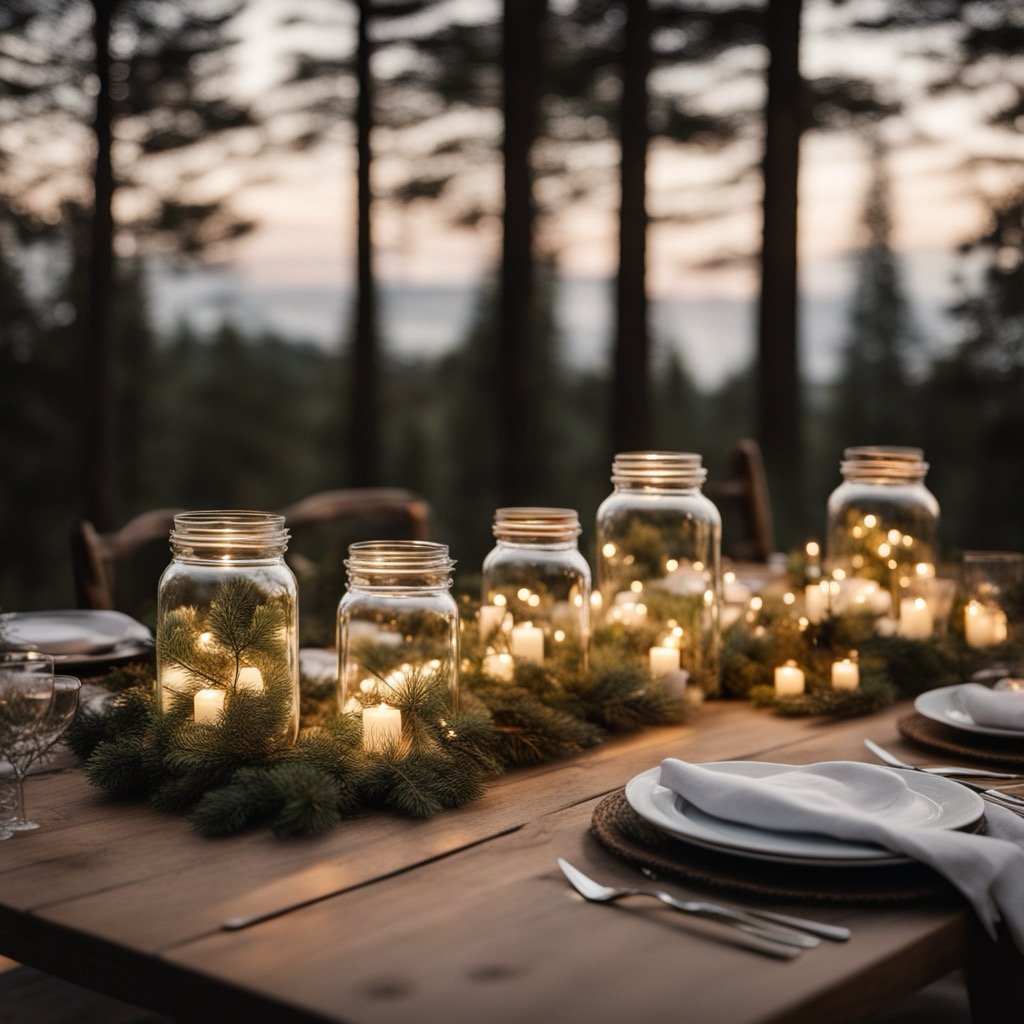
4. String Lights in a Jar Gather fairy lights and place them inside clear jars or vases. The glowing lights create a warm and inviting atmosphere, perfect for any festive setting.
To make String Lights in a Jar, you’ll need the following materials:
Materials:
Clear Glass Jars or Vases – Any size works, but larger jars allow for more lights and a brighter effect.
Batteries – If using battery-operated lights, make sure you have the correct batteries.
Decorative Additions (Optional) – Small ornaments, pine cones, or artificial snow for a seasonal touch.
Ribbon or Twine (Optional) – To tie around the jar for a decorative accent.
Instructions:
Prepare the Lights: Insert batteries if needed and check that the lights are working.
Arrange in the Jar: Place the fairy lights inside the jar, arranging them evenly for the best glow.
Add Decorations: Optionally, add ornaments or seasonal elements around the lights in the jar.
Decorate the Lid or Neck: Tie a ribbon or twine around the top for added charm.
This is the perfect DIY Decoration project to do with your family.
5. Paper Snowflakes Fold white paper and cut intricate designs to create beautiful paper snowflakes. Hang them from the ceiling or place them in windows for a delightful winter ambiance.
To make Paper Snowflakes, you’ll need just a few basic materials:
Materials:
White Paper– Standard printer paper or thin craft paper; square pieces work best.
Scissors – Small, sharp scissors for precise cutting.
Pencil– For sketching designs if you want to pre-plan your cuts.
String or Fishing Line (Optional) – For hanging your finished snowflakes.
Tape or Clear Adhesive (Optional) – To attach snowflakes to windows or walls.
Instructions:
Fold the Paper – Fold the paper into triangles or other shapes for a snowflake pattern.
Cut Out Shapes – Use scissors to cut out small shapes along the edges.
Unfold Carefully – Gently open the paper to reveal your intricate design.
Display – Hang with string from the ceiling or tape to windows for a festive look.
6. Christmas Wreath Use a foam or grapevine wreath as a base and decorate it with artificial greenery, berries, ribbons, and small ornaments. Hang it on your front door for a cheerful welcome.
To make a festive DIY Christmas Wreath, here are the materials you’ll need:
Materials:
Wreath Base – Use a foam or grapevine wreath form as a sturdy base.
Artificial Greenery – Pine branches, fir, or holly garlands that wrap around the base.
Berry Sprigs – Artificial red berries for a pop of color and a seasonal touch.
Ribbon– A festive ribbon, such as red plaid or burlap, to create a bow or wrap around the wreath.
Small Ornaments – Mini ornaments, bells, or pinecones to attach as accents.
Hot Glue Gun – For securely attaching decorations to the wreath.
Floral Wire – To fasten larger items or add extra security for hanging.
Wire Cutters – For trimming the floral wire or greenery.
Instructions:
Wrap the Greenery – Attach greenery around the wreath base, using floral wire or hot glue to secure it.
Add Berries and Ornaments – Arrange berry sprigs and ornaments evenly around the wreath.
Attach a Ribbon – Tie a large bow and attach it to the top or bottom of the wreath.
Hang on the Door – Use a hook or add a loop of ribbon at the back for easy hanging.
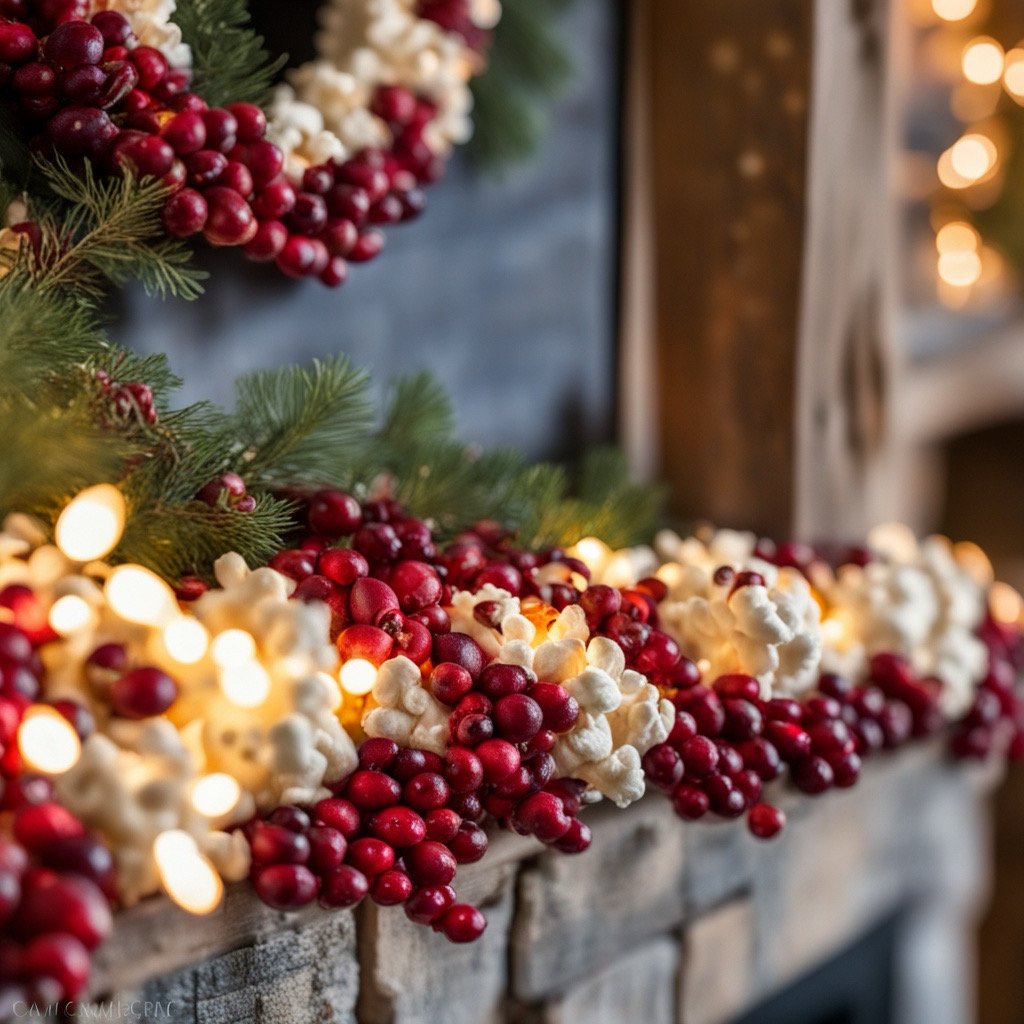
7. Garland with Cranberries and Popcorn Celebrate tradition by stringing cranberries and popcorn together. This rustic garland can be draped on your tree or along your mantel for a charming touch.
To make a Garland with Cranberries and Popcorn, here’s what you’ll need:
Materials:
Fresh Cranberries – About 1–2 bags for a long garland.
Popped Popcorn – Use plain, unbuttered popcorn to keep it sturdy and easy to string.
Needle – A large-eye needle works well for easy threading.
Strong Thread or String – Such as embroidery floss or fishing line for durability.
Scissors – For cutting the thread once you’ve reached the desired length.
Instructions:
Prepare Materials: Pop the popcorn and make sure cranberries are clean and dry.
Thread the Needle: Start by knotting one end of the thread to secure your garland.
String the Cranberries and Popcorn: Alternate cranberries and popcorn, or create a pattern you like.
Hang Your Garland: Once you reach your desired length, tie off the end and drape the garland on your tree or mantel.
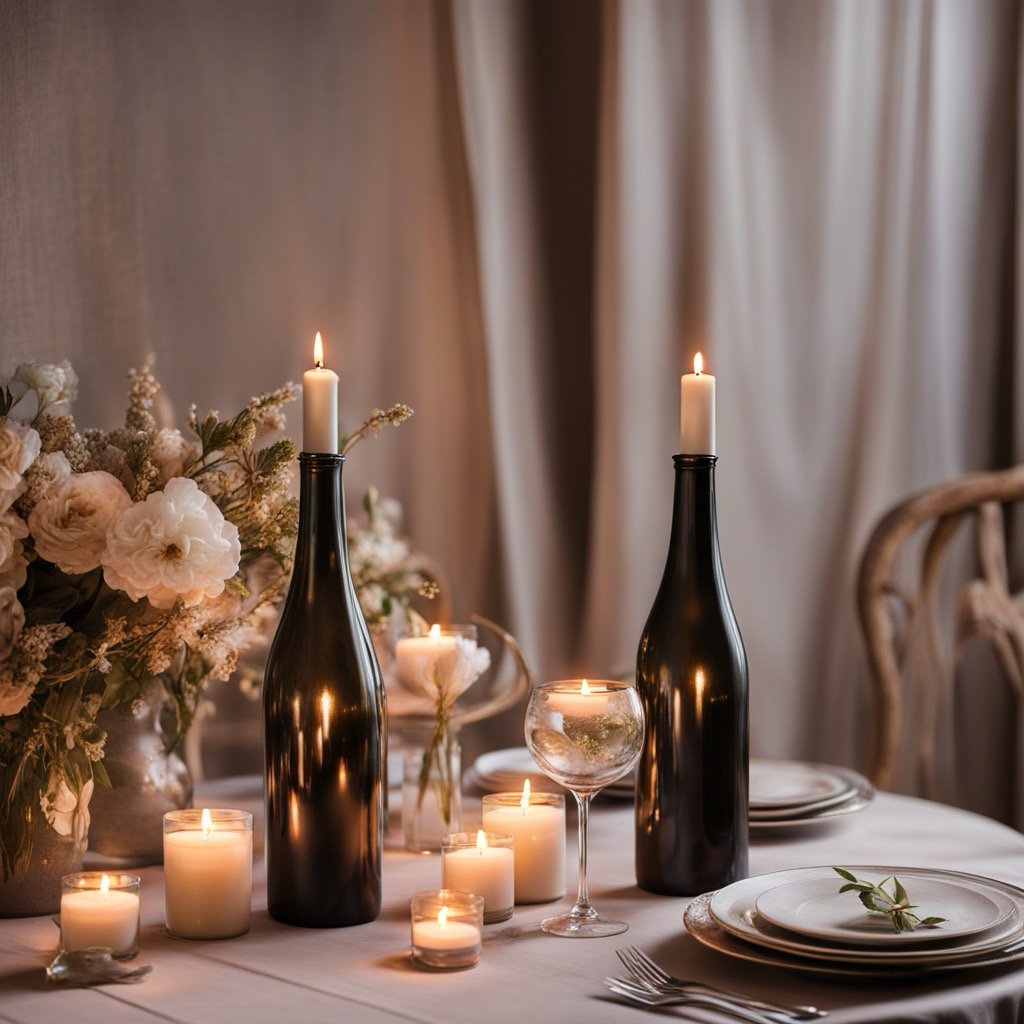
8. Upcycled Wine Bottle Candle Holders Transform old wine bottles by painting them in festive colors, or wrapping them with twine. Place candles on top for an elegant centerpiece that’s sure to impress.
To make this DIY Decoration Idea you’ll need the following materials:
Materials:
Empty Wine Bottles – Cleaned and dried; choose green, clear, or amber bottles for a festive look.
Paint or Spray Paint – Festive colors like gold, silver, red, or green work well.
Twine or Ribbon – For wrapping around the bottle necks for added texture.
Candles– Taper candles that fit snugly in the bottle openings.
Hot Glue Gun (Optional) – To secure the twine or ribbon.
Decorative Accents (Optional) – Small ornaments, faux holly, or berries to attach to the bottle necks.
Sandpaper (Optional) – To gently roughen the surface for better paint adhesion.
Instructions:
Clean the Bottles: Ensure bottles are label-free and dry.
Paint the Bottles: Use spray paint or acrylic paint to coat the bottles in your desired colors.
Wrap with Twine: Secure twine or ribbon around the necks with hot glue if needed.
Insert Candles: Place taper candles in the bottle openings.
Add Decorative Accents: Attach small ornaments or greenery for extra charm.
9. Holiday Picture Frames Take wooden frames or upcycle old ones by adding holiday-themed decorations like ribbons or ornaments. Insert pictures from past Christmases or artwork from your kids.
Instructions: 1. Open each ornament and fill it with fake snow or glitter. 2. Add small treats or handwritten notes inside each one for a surprise. 3. Close the ornaments securely. 4. Attach a ribbon or twine to hang them. 5. Label each ornament with numbers 1 to 10 using stickers or paint. 6. Hang them on a festive tree or string them in a garland.
Creating these DIY decorations Ideas is a wonderful way to get into the Christmas spirit, and they’ll bring joy to your home.
Share your creations on social media and inspire others to craft their own festive decorations! Happy crafting!
Embracing Minimalist Design – A Path to Simplicity and Elegance
In an increasingly complex world, minimalist design offers a refreshing escape through simplicity and intentionality. Rooted in the principle of “less is more,” minimalist design focuses on creating clean, functional spaces that prioritize quality over quantity. Whether in architecture, interior decor, or lifestyle choices, this design approach emphasizes uncluttered environments, harmonious proportions, and the mindful use of color and texture. This article explores the core principles of minimalist design, its growing appeal, and practical ways to incorporate it into various aspects of your life. Discover how minimalist design not only enhances aesthetics but also promotes a more peaceful, purposeful living environment. If you want to learn more about Design Styles you can learn here
Minimalist Design (Livingroom)
Understanding Minimalism
At its core, minimalist design is about stripping away the excess and focusing on what truly matters. It encourages us to declutter both our spaces and our minds, creating environments that promote calmness and clarity. The mantra here is “less is more,” championing quality over quantity in every aspect of your home decor.
Key Principles of Minimalist Design
1. Simplicity: Minimalist spaces are characterized by clean lines, simple shapes, and a restrained color palette. This creates a harmonious environment that feels open and airy.
2. Functionality: Every piece of furniture or decor should serve a purpose. Look for multi-functional items that provide utility without compromising style.
3. Neutral Color Palette: Most minimalist designs feature a neutral color scheme, such as whites, grays, beiges, and soft pastels. This helps create a cohesive look that feels calm and inviting.
4. Natural Materials: Incorporating organic materials like wood, metal, and stone can add warmth and texture to an otherwise sparse environment.
5. Focus on Space: Open layouts with well-defined spaces allow for natural flow and movement. Avoid overcrowding areas with furniture or decor to maintain a sense of openness.
6. Thoughtful Decor: When choosing art or decorative pieces, opt for those that resonate with you and enhance the overall aesthetic without overwhelming the space.
The Best Tips for Creating a Minimalist Home
1. Declutter Ruthlessly: Start by assessing your belongings. Keep only what you truly need or what brings you joy. Consider the one-in, one-out rule: for every new item you bring in, take one out.
2. Invest in Quality: Look for high-quality, timeless pieces that will last. This reduces the need for constant replacements and enhances your space’s longevity.
3. Opt for Built-In Storage: Design built-in shelving or cabinets to keep items organized and out of sight. This helps maintain a clean and streamlined look.
4. Mindful Color Choices: Select a calming color palette for your walls and furnishings. Stick to two or three colors to create coherence in your design.
5. Use Lighting Creatively: Good lighting can enhance minimalist spaces dramatically. Use a mix of ambient, task, and accent lighting to highlight specific areas while maintaining an overall serene atmosphere.
6. Add Greenery: Including plants in your minimalist space introduces life and vibrancy. Opt for simple planters and choose plants that require minimal maintenance.
Minimalist Design Entryway
Conclusion
Minimalist design is more than just a trend; it’s a lifestyle that promotes simplicity and purposeful living. By embracing the principles of minimalism, we can create spaces that reflect tranquility, functionality, and beauty. Whether you’re starting from scratch or simply wanting to declutter your home, adopting a Minimalist approach can lead to a more peaceful and organized life. Remember, it’s not just about what you remove, but also about how you choose to live and enjoy the simplicity around you!
Creating a cozy coffee station at home is the perfect way to bring the café experience right into your kitchen or living space. Whether you’re a coffee connoisseur or just enjoy an occasional cup, a coffee station can add style, organization, and convenience to your daily routine. Here’s a look at some of the best coffee station ideas to transform your home into a personal café sanctuary.
1. Minimalist Coffee Nook
If you prefer a clean, clutter-free aesthetic, a minimalist coffee station could be your ideal choice. Set up a small shelf or cabinet in a corner with just the essentials: a coffee maker, a few mugs, and a canister for coffee beans or grounds.
Style & Tips:
Keep it Simple: Choose a neutral color palette—think whites, blacks, or greys—that matches your kitchen or living room decor.
Essential Accessories: Use clear or matte-finish containers for coffee grounds, sugar, and creamers.
Compact Design: Minimalist coffee stations work well in smaller spaces like apartments or studio kitchens.
2. Rustic Farmhouse Coffee Station
The rustic farmhouse style brings warmth and character into any home. With elements like distressed wood, metal accents, and mason jars, this style gives a charming, vintage feel to your coffee area.
Style & Tips:
Materials Matter: Use a reclaimed wood console or a small wooden table with distressed finishes to set the tone.
Accessories: Mason jars for storing coffee beans and tea bags, a few vintage signs, and metal mugs add to the rustic look.
Finishing Touches: Small plants or succulents can bring a touch of greenery, making the station look inviting and cozy.
3. Coffee Bar Cart Station
A coffee bar cart is a flexible, stylish choice that works in any space, from your living room to your dining room. It’s perfect for entertaining guests or moving your coffee essentials to different spots in your home.
Style & Tips:
Choose the Right Cart: Look for a multi-level bar cart with a sturdy frame to hold all your coffee essentials.
Easy Access: Stock it with your favorite coffee machine, mugs, syrups, and maybe even a small bowl for fresh fruits or pastries.
Mobile Design: This design is great for small spaces, and it can double as a tea cart or even a cocktail station in the evening!
4. Modern Glam Coffee Station
For a luxurious touch, try a modern glam coffee station that combines chic decor with practical functionality. With glossy finishes, metallic accents, and sophisticated colors, this station feels like a high-end café.
Style & Tips:
Metallic Accents: Opt for gold or rose gold handles, shelves, and canisters for a touch of glam.
Mirrored or Glossy Surfaces: Reflective surfaces can enhance light and add an elegant vibe to the station.
Sophisticated Accessories: Choose stylish cups, decorative jars, and a fancy coffee machine to complete the look.
5. Built-In Cabinet Coffee Station
If you’re working with a larger kitchen space, a built-in coffee station could be an excellent option. This station is integrated directly into your kitchen cabinetry, keeping everything organized and out of sight.
Style & Tips:
Customizable Storage: Built-in shelves and cabinets can be customized to fit your coffee machine, mugs, and any other accessories.
Discreet Design: You can close the doors when the station isn’t in use, keeping your kitchen looking tidy.
Smart Features: Consider adding lighting inside the cabinet for a welcoming glow in the morning!
6. Scandinavian Coffee Station
Embrace simplicity and functionality with a Scandinavian coffee station. This design focuses on light colors, natural materials, and a clutter-free approach.
Style & Tips:
Light and Airy: Use a light wood table or shelves with white, black, or pastel accents.
Functional Decor: Keep decor minimal—maybe a small plant or a framed print, but nothing too busy.
Efficient Storage: Opt for a few open shelves to hold mugs, coffee, and accessories for easy access.
7. Industrial Coffee Station
Industrial-style coffee stations are all about raw materials and exposed elements, perfect for a modern loft or contemporary home.
Style & Tips:
Materials: Use dark metals, brick, and reclaimed wood for a rugged look.
Open Shelving: Floating shelves in metal or wood add a raw charm and let you easily access mugs, jars, and coffee essentials.
Bold Accessories: Industrial decor often includes bold accessories—think large coffee bean jars or vintage-style espresso machines.
8. Eclectic Coffee Station
For those who love to mix and match, an eclectic coffee station allows for a personalized, unique look. Combine various textures, colors, and patterns to reflect your personality and make your coffee corner a lively spot.
Style & Tips:
Mix Materials: Combine wood, glass, ceramics, and metals for a rich, layered look.
Add Personal Touches: Use unique cups, quirky decor pieces, and even framed art to give your station character.
Bright Colors: Eclectic designs are ideal for those who love color—don’t be afraid to mix and match!
9. DIY Coffee Station
If you love a good DIY project, create a custom coffee station using upcycled items or by repurposing furniture you already own. This is a budget-friendly, creative way to design a coffee corner that perfectly suits your style.
Style & Tips:
Repurpose Old Furniture: An old dresser, bookshelf, or side table can easily become a coffee station with a little paint and some new hardware.
Add Your Own Decor: Personalize it with your favorite mugs, a homemade coffee sign, or vintage canisters.
Functional Setup: DIY stations let you arrange everything exactly the way you like it.
Here’s a list of essential items for a coffee station:
Coffee Maker; Drip coffee maker, espresso machine, or French press.
Coffee Grinder; For freshly ground coffee beans. Coffee Beans or Pod; Your favorite coffee type.4. Mugs and Cups; A variety of sizes for different beverages. Coffee Filters; If using a drip coffee maker. Milk Frother; For lattes and cappuccinos. Syrups and Flavorings; Vanilla, caramel, hazelnut, etc. Sugar and Sweeteners; Regular sugar, brown sugar, or alternatives. Creamer or Milk; Dairy or non-dairy options. Stirring Utensils; Spoons or stir sticks. Kettle; For hot water or tea options. Canisters; For storing coffee beans, sugar, and other ingredients. Napkins or Coasters; For a tidy setup. Open Shelving; To display and organize items stylishly. Decorative Accents; Plants, art, or signs to add personality.
Wrapping Up
Creating a coffee station is about blending style and function in a way that fits your personal taste and space. From minimalist designs to eclectic setups, there’s no shortage of creative ways to set up a coffee corner at home. A stylish coffee station not only elevates your space but also makes your daily coffee ritual more enjoyable.
By adding a few personal touches and essential accessories, you’ll have a coffee station that’s as beautiful as it is practical. Now, all you need is your favorite coffee blend, and you’re ready to enjoy your perfect cup in the comfort of your own home!
Adding metal accents to your home is a great way to introduce elegance, modernity, and sometimes even a touch of vintage flair. Whether it’s gold, brass, chrome, or stainless steel, metal accents can complement any design style and instantly elevate your space. Here’s a guide to the best metal accents for each room in your home and some tips on how to use them effectively.
The Best Metal Accents for Living Room
1. Living Room: Brass and Gold for Warmth and Style
Why Brass and Gold?
Brass and gold have warm undertones that add a cozy, inviting feel to living spaces. These metals are perfect for creating an elegant or vintage look, and they work especially well with neutral or jewel-toned color palettes.
2. Kitchen: Stainless Steel and Chrome for a Sleek, Functional Look
Why Stainless Steel and Chrome?
Stainless steel and chrome are highly durable and easy to clean, making them ideal for high-traffic areas like kitchens. They create a sleek, modern look that works well with any color scheme, from all-white kitchens to darker, moody tones.
Where to Use Stainless Steel and Chrome?
Appliances: Stainless steel appliances are a classic choice for a modern kitchen look and are incredibly durable.
Cabinet Hardware: Chrome or stainless steel knobs and pulls add a modern edge and complement any cabinet color.
Backsplash:Try a stainless steel backsplash for an industrial feel that’s both stylish and easy to clean.
The Best Metal Accents for Your Bathroom
3. Bathroom: Polished Nickel and Brushed Gold for Timeless Elegance
Why Polished Nickel and Brushed Gold?
These finishes add a luxurious and timeless feel to bathrooms without overwhelming the space. Polished nickel has a subtle shine, while brushed gold offers a more matte look, both of which can pair beautifully with classic marble, white, or soft pastel color schemes.
Where to Use Polished Nickel and Brushed Gold?
Faucets and Showerheads: These accents are functional and add a touch of elegance. Brushed gold is particularly popular for creating a spa-like ambiance.
Towel Bars and Hooks: Matching your towel bars and hooks to your faucet finish creates a cohesive, polished look.
Mirror Frames: A brushed gold or polished nickel mirror frame can be a subtle but impactful focal point in the bathroom.
The Best Metal Accents for Your Bedroom
4. Bedroom: Copper and Rose Gold for a Soft, Romantic Touch
Why Copper and Rose Gold?
Copper and rose gold offer a unique metallic look with a pinkish undertone that’s perfect for creating a soft, romantic feel. These metals work well with neutral palettes or deep colors like navy and emerald green.
Where to Use Copper and Rose Gold?
Bed Frames: A copper or rose gold bed frame can serve as a statement piece in the bedroom.
Decorative Items:Small decor pieces, like candle holders or photo frames, add a subtle metallic touch without overwhelming the space.
The Best Metal Accents for Your Entryway and Hallways
5. Entryway and Hallways: Mixed Metals for a Balanced, Eclectic Look
Why Mixed Metals?
Hallways and entryways are ideal spaces for experimenting with different metal finishes. Mixing metals creates an eclectic, curated look and prevents the space from feeling too matchy-matchy.
Where to Use Mixed Metals?
Light Fixtures and Wall Sconces: Choose a combination of finishes for a balanced yet interesting look. For example, a bronze sconce paired with a chrome or brass mirror frame.
Mirrors and Console Tables: An iron console table paired with a gold mirror frame can create a striking contrast in the entryway.
Decorative Hooks and Knobs: Mixed metal hooks for coats or keys add a touch of functionality and style to the hallway.
The Best Metal Accent Pairing Tips
Pair Warm and Cool Tones: Try combining warm metals (like brass and gold) with cool ones (like chrome and silver) for a well-balanced look.
Stick to Three Finishes: Limit your metal choices to a maximum of three finishes per space to avoid visual clutter.
Coordinate with Your Color Scheme: Choose metals that complement the room’s existing color palette for a cohesive look.
Metal accents are versatile and can be tailored to suit any design style, from modern and industrial to vintage and eclectic. By choosing the right metal for each room and pairing it thoughtfully, you can add a timeless touch of style to your home that reflects both current trends and your unique taste.
Welcome to the World of “Kitschens”: Bringing Retro Fun and Playfulness to Your Kitchen Design.
Kitchen into a ‘Kitschen’! In a time where minimalism has taken the lead, a new and refreshing kitchen decor trend is making waves: “Kitschens.” This playful term merges “kitschy” and “kitchen” and invites a burst of color, nostalgia, and whimsy into your culinary space. With eclectic decor, bold patterns, and vintage flair, kitschens embrace the quirky and unexpected. If you’re a fan of unique designs, vintage-inspired pieces, and a bit of fun, this decor trend might be for you!
What Makes a Kitchen a “Kitschen”?
Kitschens combine elements of retro nostalgia and bold, eye-catching decor that feels cozy and a bit whimsical. Key features of kitschens include bright colors, retro appliances, eclectic wall art, and unique trinkets that add character. Imagine stepping into a space that feels like a 1950s diner mixed with flea market finds, bringing a unique charm and a hint of humor into everyday cooking and entertaining.
The Best Key Elements of a Kitchen into a ‘Kitschen’
1. Color Palette to transform a Kitchen into a ‘Kitschen’
• Bright Pastels and Bold Primaries: Think mint green,bubblegum pink, turquoise, and mustard yellow. These colors bring a playful retro vibe to the space.
2. Retro Appliances
• Classic appliances in vintage colors bring the kitschen to life. Look for 1950s-inspired fridges, colorful toasters, and mixers that feel straight out of grandma’s house.
• The heart of a kitschen lies in the details. Seek vintage posters, retro signage, quirky salt and pepper shakers, or ceramic figurines. Nothing that makes the space feel quirky or even silly is perfect.
• Revamp your kitchen accessories by upcycling vintage items. You could repaint an old metal tray in bright colors, use antique glass bottles as vases, or even repurpose an old record as a table centerpiece.
Bold Wall Art
• Curate a gallery wall with vintage food ads, 1950s diner signs, or quirky art prints that evoke nostalgia.
DIY Patterned Curtains or Tablecloths
• Make your own curtains or tablecloths with retro-patterned fabric. Bold colors, floral prints, or polka dots will bring the vintage feel full circle.
Kitschens in Small Spaces: How to Make It Work
Kitchen into a ‘Kitschen’
Even if you have a smaller kitchen, you can still capture the kitschen essence. Choose a few statement pieces that won’t overcrowd the room but will add personality. A pastel-colored toaster, checkered flooring tiles, or a few eclectic decor items can make a big impact in a compact space.
Kitschens bring a sense of nostalgia and personality into the heart of the home. Mixing vintage with modern creates a space that’s both functional and full of character. Whether you want to go all out with bold colors and retro appliances or just add a few vintage accents, the kitschen trend lets you make the space your own.
Transform Your Space with these interior design style!
Looking to refresh your home this year? In 2024, interior design style trends focus on blending comfort, elegance, and individuality. Whether you prefer minimalist spaces or love bold patterns, this guide will walk you through the most popular styles. We’ll also provide practical tips on how to incorporate these trends into your home and suggest visual ideas for inspiration.
1. Organic Modern: Where Nature Meets Modernity
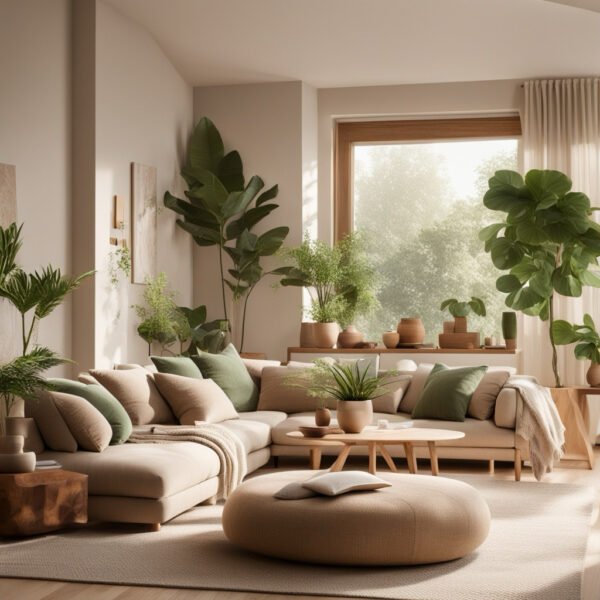
Modern Organic Living Room
Organic Modern Interior Design
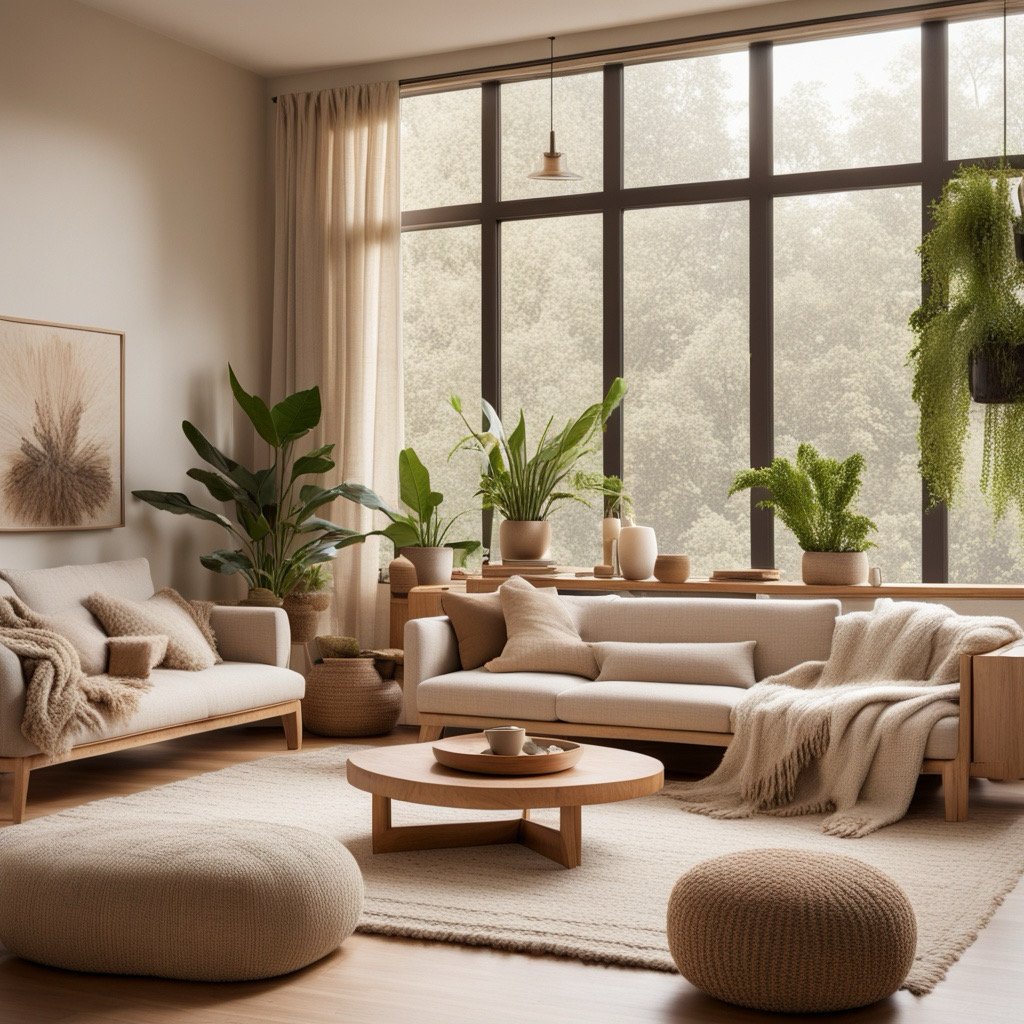
It is a popular interior design trend that fuses the sleekness of modernism with the warmth of natural materials. It emphasizes simplicity, comfort, and sustainability, creating cozy yet elegant spaces. This trend harmonizes sleek, modern elements with natural materials likewood, rattan, and organic textiles. Expect neutral color palettes, natural light, and minimal clutter.
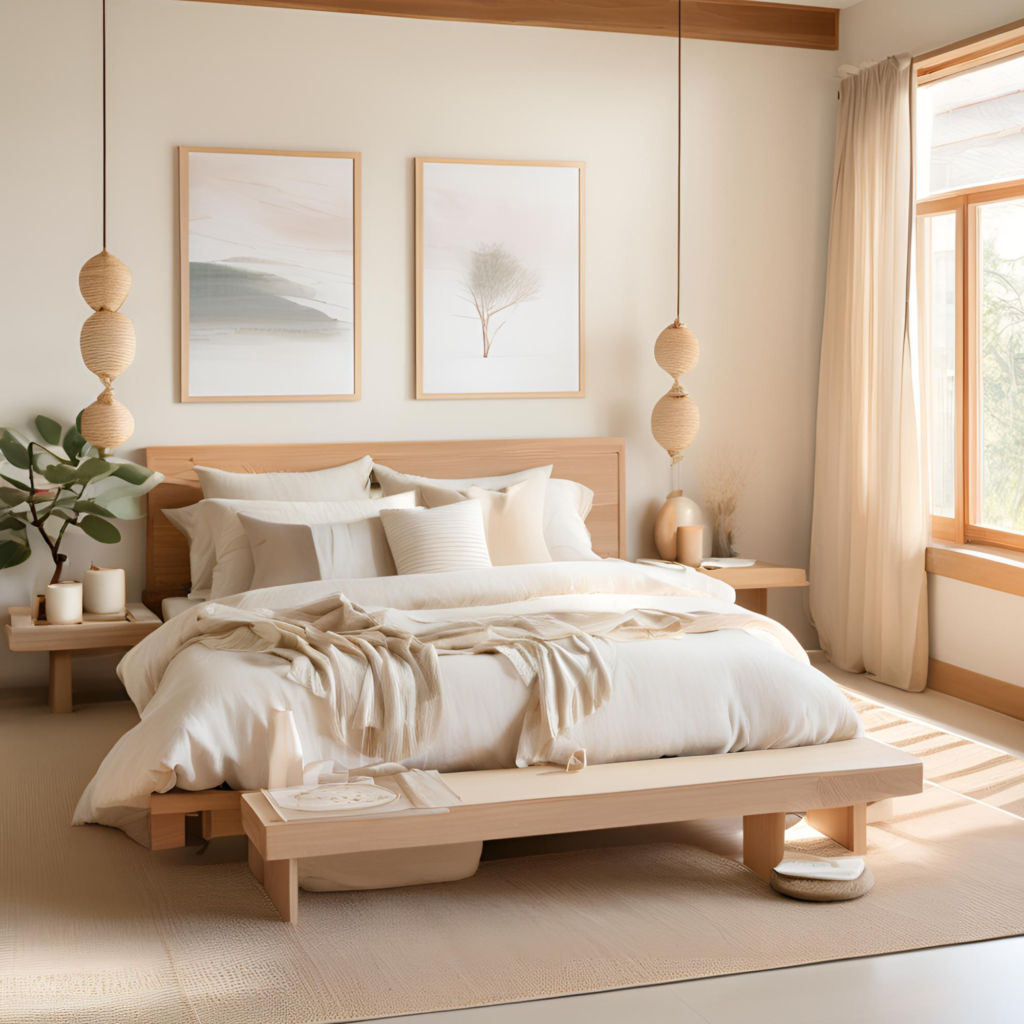
It is a fusion of Japanese and Scandinavian aesthetics, creating spaces that are minimalist, functional, and serene. This style combines the Japanese philosophy of “wabi-sabi” (embracing imperfection) with the Scandinavian concept of “hygge”(comfort and coziness). Japandi has gained popularity because it promotes simplicity, sustainability, and peaceful living environments. Think clean lines, natural textures, and earthy tones like beige, soft browns, and charcoal.
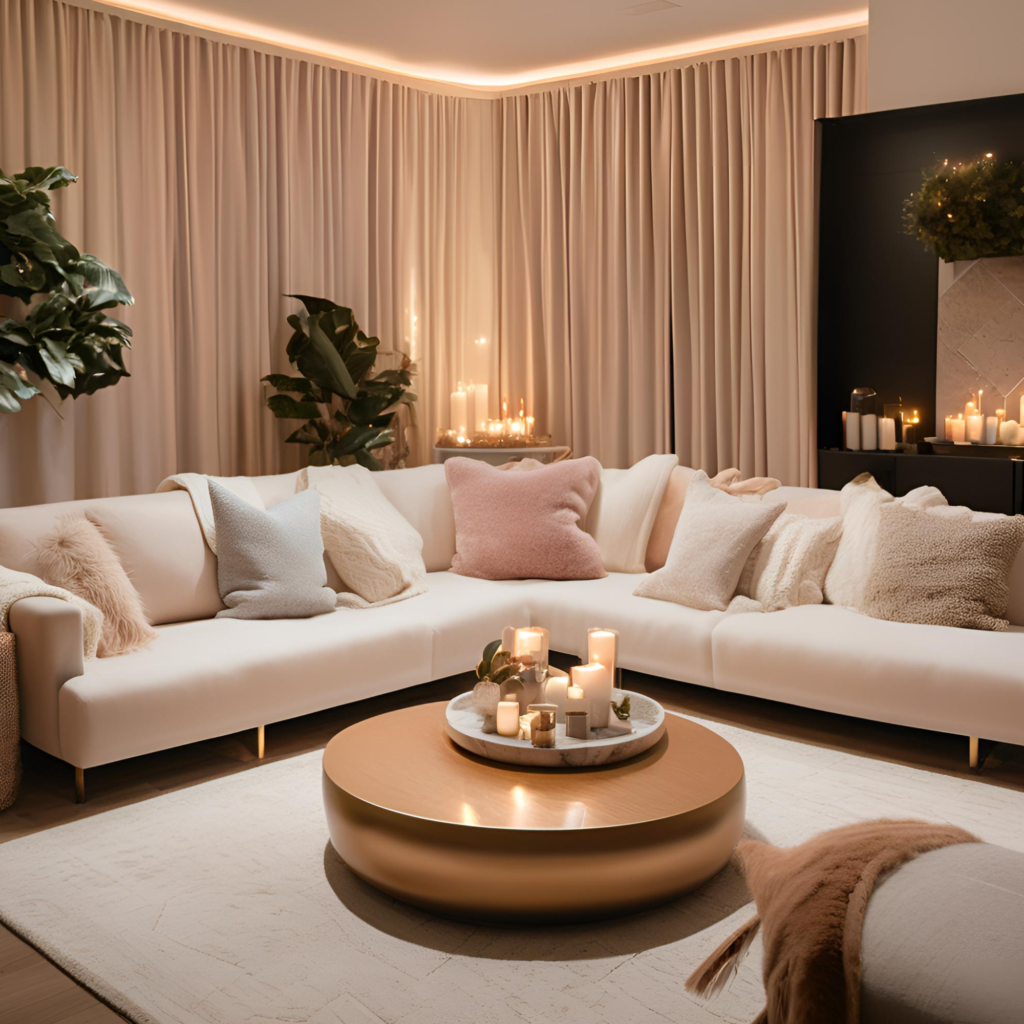
It is focuses on understated elegance, prioritizing quality over quantity and creating spaces that feel sophisticated without being showy. This design trend embracestimeless elements, high-quality materials, and neutral tones, offering an environment that feels both serene and luxurious. It’s the opposite of flashy opulence—think elegant textures and soothing tones.
Tips:
Choose Fewer, Better Pieces: Invest in timeless furniture that will last, such as a classic leather chair or a high-quality wool rug.
Focus on Materials: Opt for natural fabrics, handcrafted ceramics, and high-end finishes that feel good to the touch.
Neutral Base with Subtle Accents: Start with a neutral palette and layer in organic textures—like a linen sofa with a soft cashmere throw.
Declutter Thoughtfully:Keep the space neat, but leave a few personal touches, such as a vintage vase or a curated stack of books.
4. Maximalism: Embrace Bold, Personal Spaces
Maximalism InteriorDesign
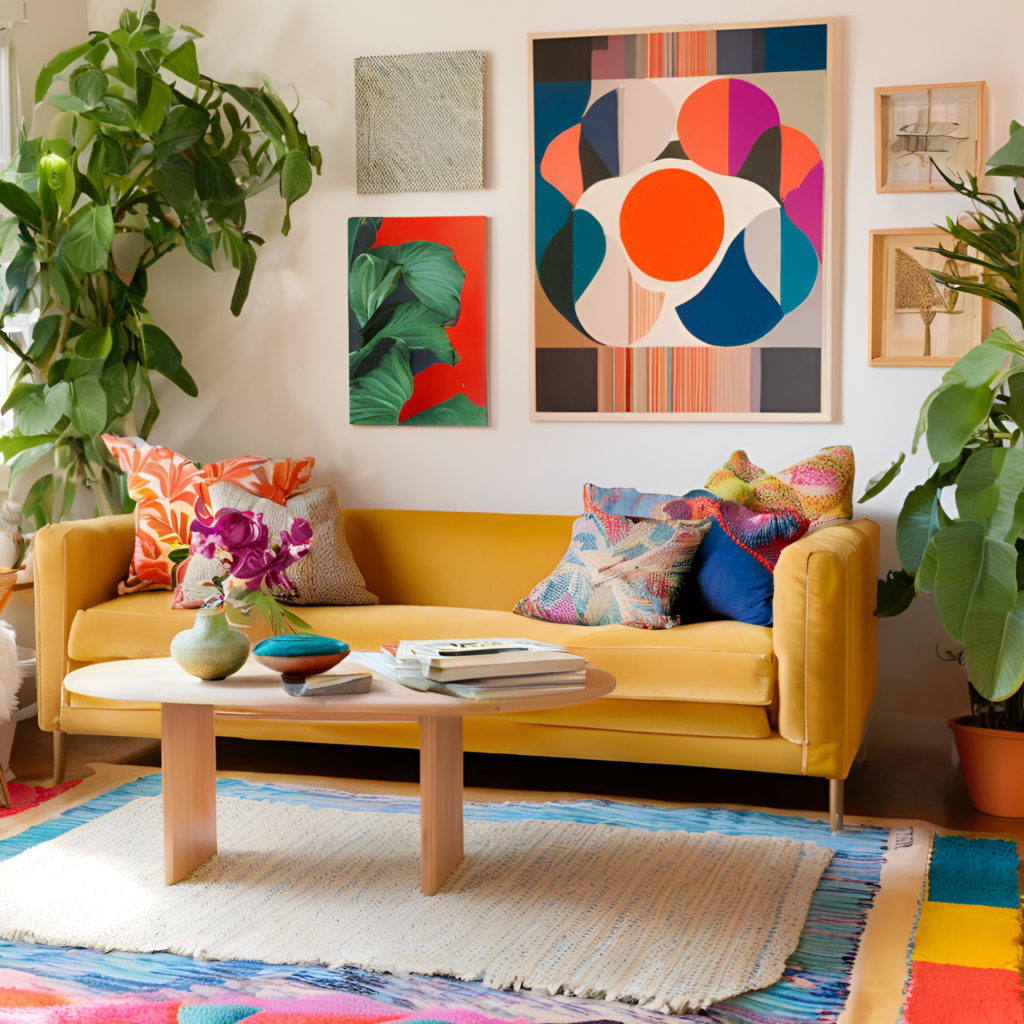
Is the opposite of minimalism, celebrating boldness, creativity, and personal expression. It embraces the idea that more is more, using vivid colors, layered patterns, and curated collections to create lively, eclectic interiors. This style allows homeowners to fill their spaces with objects that tell a story, often mixing different time periods, textures, and cultural influences.
Tips for Maximalist Interiors
Start Small: Begin with one area, such as a gallery wall, and experiment with mixing prints, textures, and colors.
Color Cohesion:While the palette can be vibrant, try to stick to a few main colors throughout the space to create unity.
Display with Purpose:Use open shelving or walls to display collections like books, vases, or art, ensuring it feels curated rather than cluttered.
Comfort Matters: Balance bold décor with soft textiles and cozy furniture, so the space remains functional and inviting.
Maximalism offers an exciting way to express individuality and fill your space with pieces that inspire joy. Rather than following strict rules, this style encourages you to have fun and embrace imperfections, creating a home that’s uniquely yours.
5. Sustainable Design: Style with a Purpose
Sustainable InteriorDesign
It is an approach to interior and architectural design that focuses on minimizing environmental impact and creating spaces that promote long-term well-being. It emphasizes the use of eco-friendly materials, energy efficiency, waste reduction, and conscious consumption. The goal is to design homes that are both beautiful and aligned with sustainable living principles. This includes using recycled materials, energy-efficient appliances, and timeless furniture pieces to reduce waste.
Tips:
Choose Long-Lasting Furniture: Invest in timeless, well-made pieces that won’t need frequent replacement.
Repurpose Items:Consider DIY projects that upcycle old furniture or décor.
Opt for Natural Light: Maximize natural light with large windows or skylights to reduce artificial lighting needs.
Go Plastic-Free:Use glass, metal, or wood alternatives instead of plastic wherever possible.
6. Blues and Warm Neutrals: Soothing Color Palettes
Blue and nuetral bedroom design.
Blues and Warm Neutrals Design
It is a versatile interior design style that balances the calming effect of blues with the inviting warmth of neutral tones. This pairing works well in modern, coastal, and traditional interiors, creating spaces that feel soothing, sophisticated, and grounded. These tones create a relaxing atmosphere while maintaining a sense of modernity.
Balanced Color Palette:
Shades of Blue: Think navy, indigo, sky blue, or dusty blues to evoke calmness and stability.
Warm Neutrals: Beige, taupe, cream, and soft browns add warmth, keeping the space from feeling too cold.
The Best Tips:
Accent Walls: Create a statement with a soft blue wall paired with neutral furniture.
Mix Fabrics: Use neutral-toned linen and wool with blue velvet or cotton for contrast.
Artwork: Introduceblue-toned art to tie the theme together.
Wood Accents: Addwooden furniture or frames to complement both the blue and neutral tones.
Use soft blue in spaces where you want to unwind, such as bedrooms or bathrooms. Pair it with warm neutrals like beige and taupe to keep the space balanced.
7. Functional Spaces: Making the Most of Every Corner
Functional Spaces
In today’s world, maximizing space is essential, whether in small apartments, large homes, or commercial environments. Designing functional spaces that utilize every corner effectively can enhance usability, aesthetics, and comfort.
Functional design isn’t just about beauty—it’s about utility. In 2024, there’s a focus on multi-purpose rooms like laundry-mudroom combos or home offices that double as guest rooms.
Here are some practical tips for designing and optimizing functional spaces, focusing on maximizing usability and comfort:
Tips for Creating Functional Spaces
Assess Needs and Activities:
Identify how the space will be used and who will use it. This helps tailor the design to specific needs, ensuring that the space is both practical and inviting.
Prioritize Layout:
Arrange furniture and elements to encourage flow and accessibility. Ensure there’s enough room for movement, especially in high-traffic areas.
Whether you prefer the simplicity of Japandi, the boldness of maximalism, or the elegance of quiet luxury, the key is to create spaces that feel right for you. Start with small changes, experiment, and let your home reflect your personality. These trends offer a perfect mix of form and function, ensuring your home is both stylish and practical. Don’t be afraid to blend multiple styles for a unique look—after all, your home should be as personal as your taste.