The Best season to get crafty! Creating your own Christmas decorations can not only enhance your holiday spirit but also add a personal touch to your home. Here are ten fun DIY decoration ideas you can try this Christmas.
Let’s get started
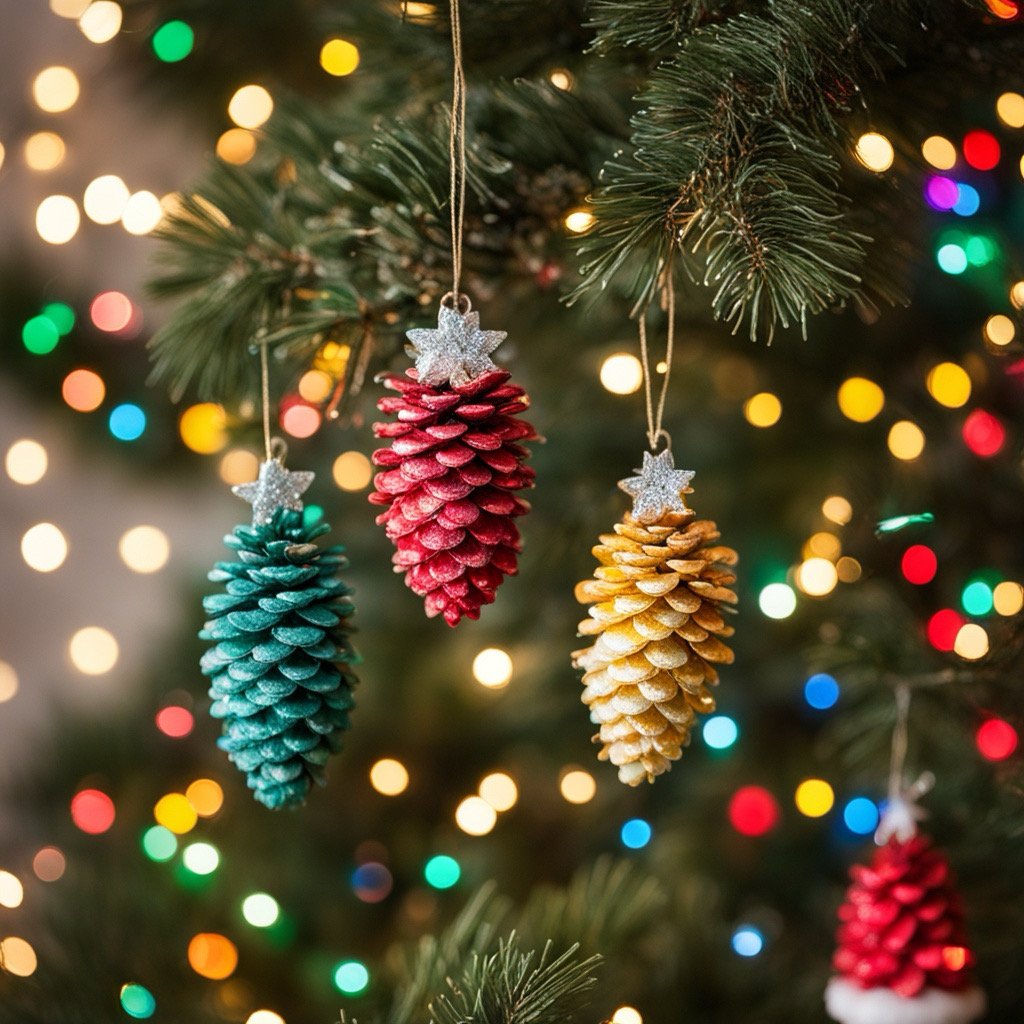
1. Pine Cone Ornaments
Collect pine cones from your yard or a local park. Paint them in festive colors, like red and green, and sprinkle glitter. Attach a ribbon for hanging. These natural ornaments add an earthy charm to your tree.
To create this DIY Decoration Idea with a festive and natural look, you’ll need:
- Pine Cones – Gather from your yard or a local park. Look for ones that are fully opened and dry.
- Acrylic Paint – Red, green, gold, or silver are great holiday colors.
- Glitter – Choose a color that complements the paint for an extra sparkle effect.
- Ribbon or Twine – For hanging the ornaments. Choose festive colors or natural twine for a rustic look.
- Glue or Mod Podge – To help the glitter adhere to the pine cones.
- Paint Brushes – For applying paint to the pine cones.
- Hot Glue Gun (optional) – For securely attaching the ribbon to the pine cone.
Instructions:
- Clean and Dry Pine Cones: Remove any dirt and ensure they’re dry.
- Paint and Glitter: Apply a light coat of paint on the edges, then sprinkle glitter while the paint is wet or use glue.
- Attach Ribbon: Hot glue a loop of ribbon or twine to the top for easy hanging.
2. Mason Jar Snow Globes
Transform mason jars into whimsical snow globes! Fill each jar with water, glitter, and small Christmas figurines like trees or reindeer. Seal the lid tightly, and shake to make it snow!
To make Mason Jar Snow Globes, here’s what you’ll need:
Materials:
- Mason Jars – Clear jars with tight-sealing lids. Any size works, but smaller jars create a classic snow globe effect.
- Water – Distilled water is ideal to keep the jar clear over time.
- Glycerin or Baby Oil – Optional, but helps the glitter fall more slowly, creating a snow effect.
- Glitter – Choose fine glitter in white, silver, or holiday colors to simulate snow.
- Small Figurines – Mini holiday trees, reindeer, snowmen, or any festive figurines that fit inside the jar.
- Waterproof Glue or Epoxy – To secure the figurines to the inside of the jar lid.
- Paint or Ribbon (Optional) – For decorating the lid or adding a festive touch.
Instructions:
- Glue Figurines to Lid: Securely attach the figurines to the inside of the lid with waterproof glue and allow it to dry completely.
- Add Water, Glycerin, and Glitter: Fill the jar with water, add a few drops of glycerin, and a small amount of glitter.
- Seal and Shake: Carefully screw the lid on tightly and shake to make it snow!

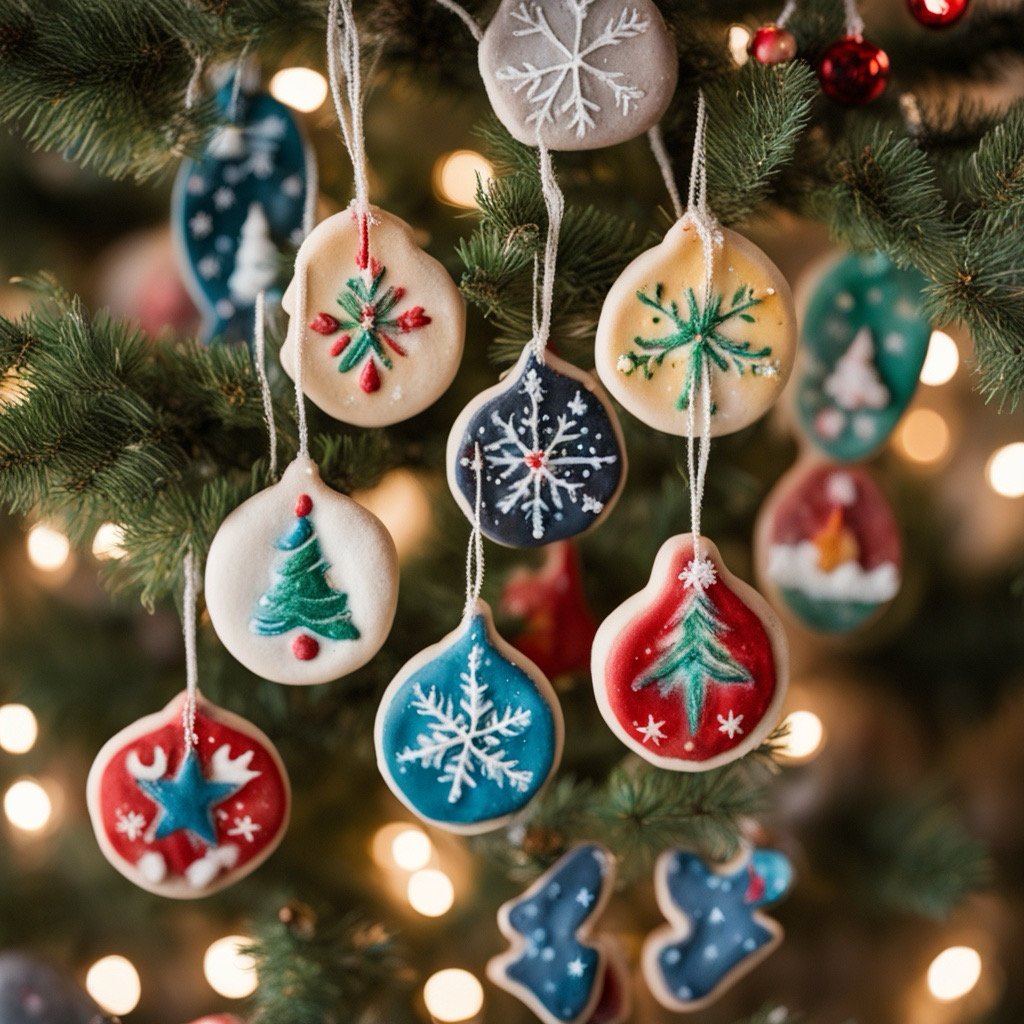
3. Salt Dough Ornaments
Make salt dough using 2 cups flour, 1 cup salt, and 1 cup water. Shape it into festive ornaments and bake at 200°F until hard. Once cooled, paint your creations in holiday colors and hang them on the tree.
To create this DIY Decoration Idea you’ll need the following materials:
Materials:
- Flour – 2 cups of all-purpose flour.
- Salt – 1 cup of regular table salt.
- Water – 1 cup to mix the dough.
- Rolling Pin – For flattening the dough.
- Cookie Cutters – In festive shapes like stars, trees, or gingerbread men.
- Baking Sheet and Parchment Paper – For baking the ornaments.
- A Straw or Toothpick – To make a hole at the top of each ornament for hanging.
- Acrylic Paint – For decorating the ornaments once they are baked and cooled.
- Paint Brushes – To apply paint details.
- Ribbon or Twine – For hanging the ornaments on the tree.
Instructions:
- Mix Dough: Combine the flour, salt, and water in a bowl until it forms a dough.
- Roll and Cut Shapes: Roll out the dough and cut it into shapes with cookie cutters.
- Make Holes for Hanging: Use a straw or toothpick to make a small hole at the top of each ornament.
- Bake: Place on a baking sheet and bake at 200°F (93°C) for about 2-3 hours, or until completely hard.
- Decorate: Once cooled, paint the ornaments in holiday colors, and thread ribbon or twine through the holes for hanging.
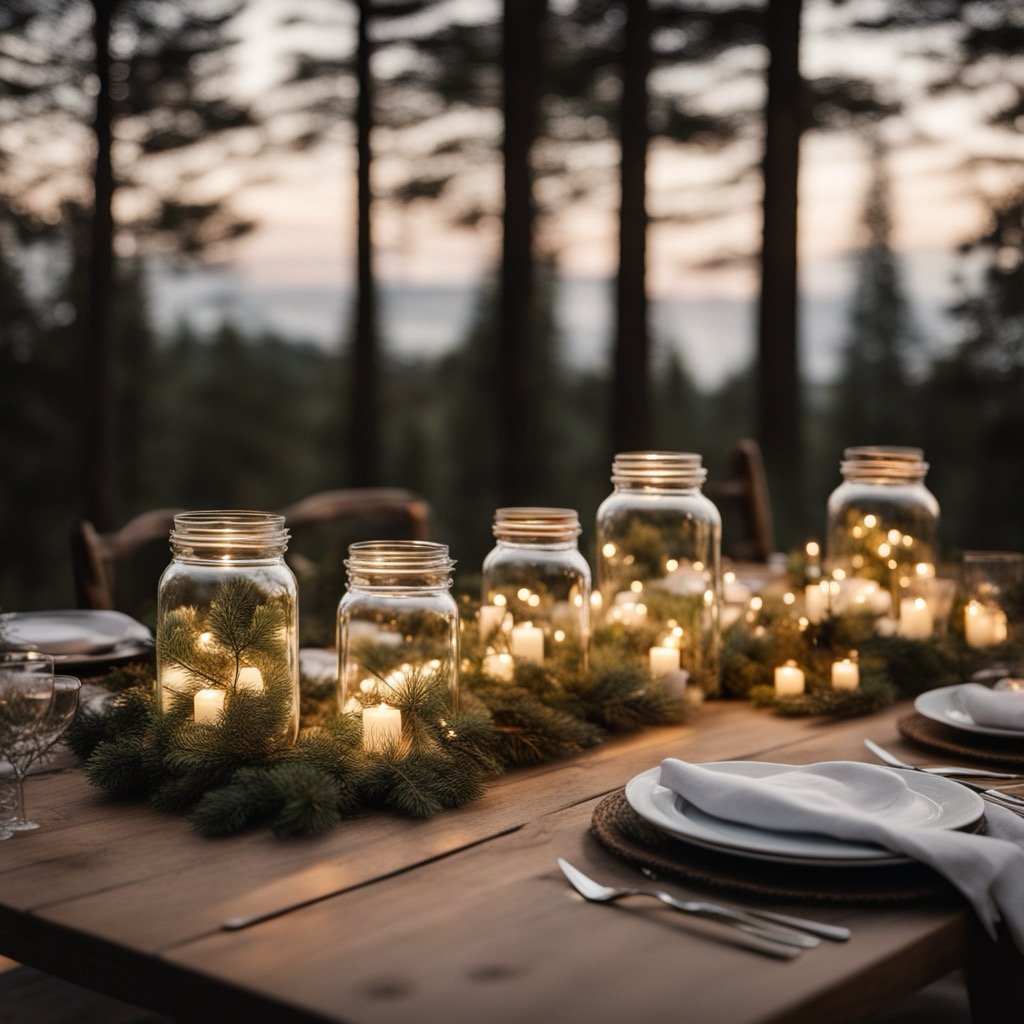
4. String Lights in a Jar
Gather fairy lights and place them inside clear jars or vases. The glowing lights create a warm and inviting atmosphere, perfect for any festive setting.
To make String Lights in a Jar, you’ll need the following materials:
Materials:
- Clear Glass Jars or Vases – Any size works, but larger jars allow for more lights and a brighter effect.
- Fairy Lights or Battery-Operated String Lights – Warm white or multi-colored lights for a festive glow.
- Batteries – If using battery-operated lights, make sure you have the correct batteries.
- Decorative Additions (Optional) – Small ornaments, pine cones, or artificial snow for a seasonal touch.
- Ribbon or Twine (Optional) – To tie around the jar for a decorative accent.
Instructions:
- Prepare the Lights: Insert batteries if needed and check that the lights are working.
- Arrange in the Jar: Place the fairy lights inside the jar, arranging them evenly for the best glow.
- Add Decorations: Optionally, add ornaments or seasonal elements around the lights in the jar.
- Decorate the Lid or Neck: Tie a ribbon or twine around the top for added charm.
This is the perfect DIY Decoration project to do with your family.
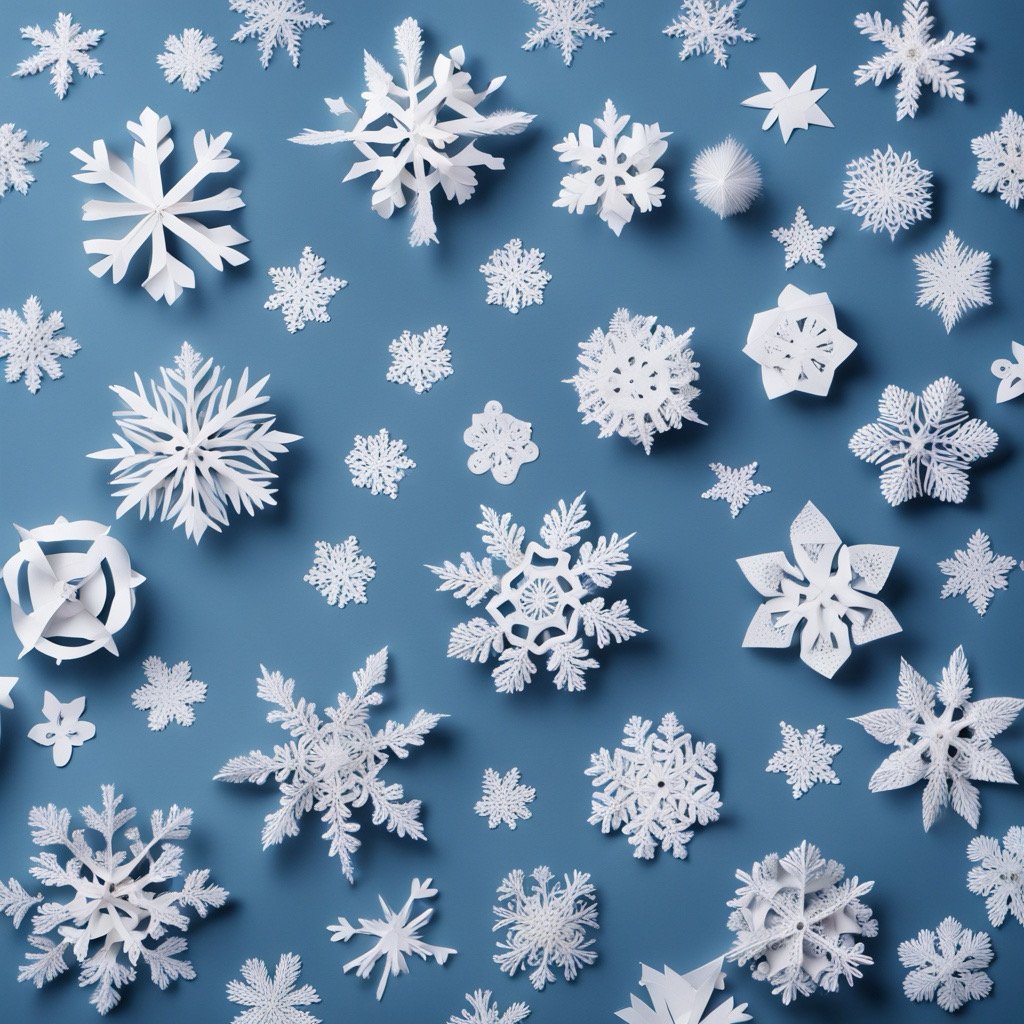
5. Paper Snowflakes
Fold white paper and cut intricate designs to create beautiful paper snowflakes. Hang them from the ceiling or place them in windows for a delightful winter ambiance.
To make Paper Snowflakes, you’ll need just a few basic materials:
Materials:
- White Paper – Standard printer paper or thin craft paper; square pieces work best.
- Scissors – Small, sharp scissors for precise cutting.
- Pencil – For sketching designs if you want to pre-plan your cuts.
- String or Fishing Line (Optional) – For hanging your finished snowflakes.
- Tape or Clear Adhesive (Optional) – To attach snowflakes to windows or walls.
Instructions:
- Fold the Paper – Fold the paper into triangles or other shapes for a snowflake pattern.
- Cut Out Shapes – Use scissors to cut out small shapes along the edges.
- Unfold Carefully – Gently open the paper to reveal your intricate design.
- Display – Hang with string from the ceiling or tape to windows for a festive look.
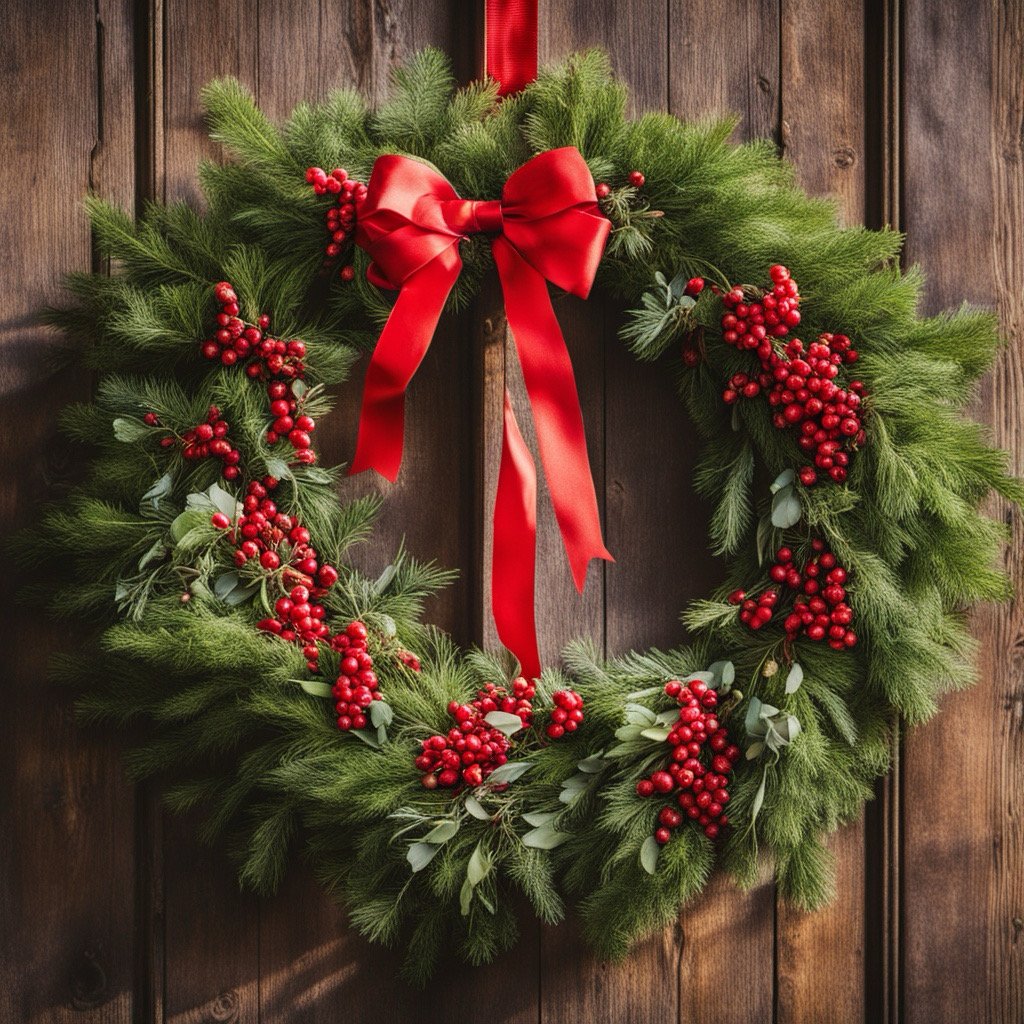
6. Christmas Wreath
Use a foam or grapevine wreath as a base and decorate it with artificial greenery, berries, ribbons, and small ornaments. Hang it on your front door for a cheerful welcome.
To make a festive DIY Christmas Wreath, here are the materials you’ll need:
Materials:
- Wreath Base – Use a foam or grapevine wreath form as a sturdy base.
- Artificial Greenery – Pine branches, fir, or holly garlands that wrap around the base.
- Berry Sprigs – Artificial red berries for a pop of color and a seasonal touch.
- Ribbon – A festive ribbon, such as red plaid or burlap, to create a bow or wrap around the wreath.
- Small Ornaments – Mini ornaments, bells, or pinecones to attach as accents.
- Hot Glue Gun – For securely attaching decorations to the wreath.
- Floral Wire – To fasten larger items or add extra security for hanging.
- Wire Cutters – For trimming the floral wire or greenery.
Instructions:
- Wrap the Greenery – Attach greenery around the wreath base, using floral wire or hot glue to secure it.
- Add Berries and Ornaments – Arrange berry sprigs and ornaments evenly around the wreath.
- Attach a Ribbon – Tie a large bow and attach it to the top or bottom of the wreath.
- Hang on the Door – Use a hook or add a loop of ribbon at the back for easy hanging.
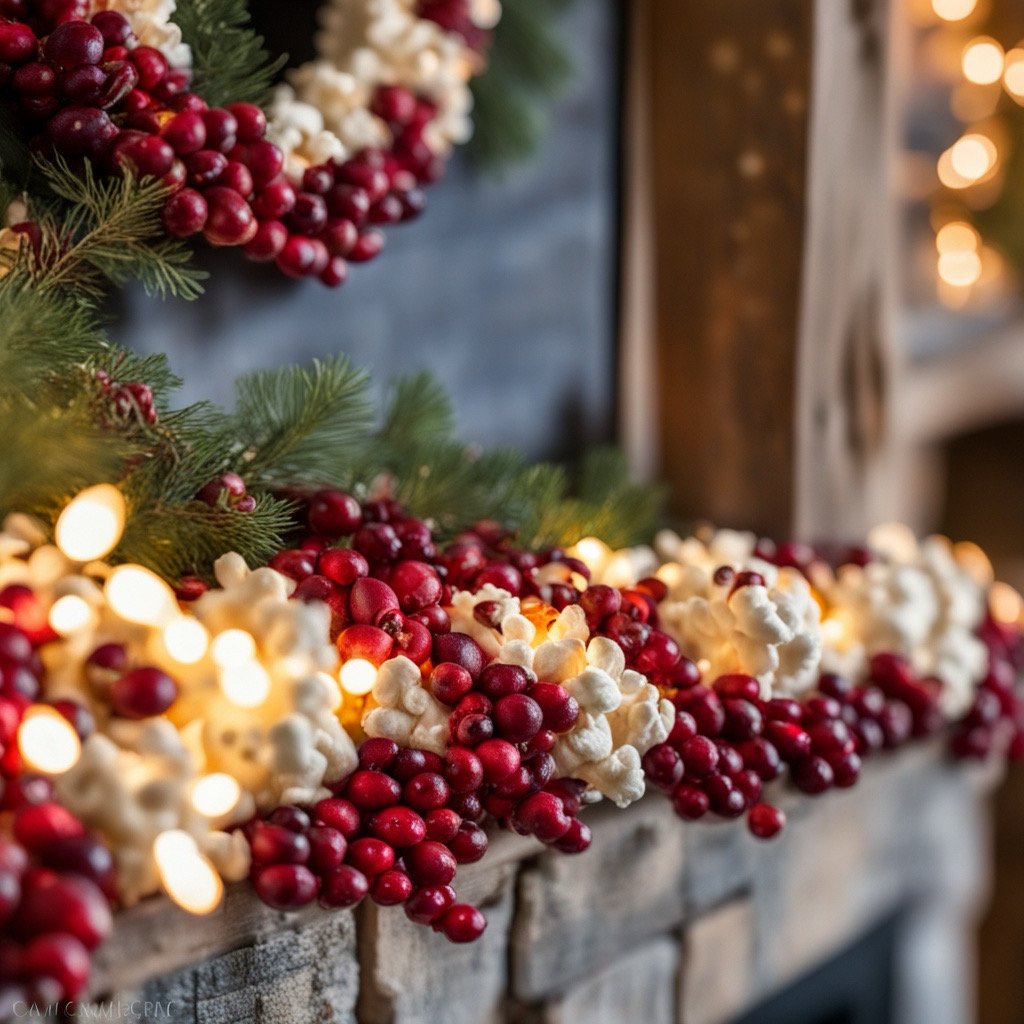
7. Garland with Cranberries and Popcorn
Celebrate tradition by stringing cranberries and popcorn together. This rustic garland can be draped on your tree or along your mantel for a charming touch.
To make a Garland with Cranberries and Popcorn, here’s what you’ll need:
Materials:
- Fresh Cranberries – About 1–2 bags for a long garland.
- Popped Popcorn – Use plain, unbuttered popcorn to keep it sturdy and easy to string.
- Needle – A large-eye needle works well for easy threading.
- Strong Thread or String – Such as embroidery floss or fishing line for durability.
- Scissors – For cutting the thread once you’ve reached the desired length.
Instructions:
- Prepare Materials: Pop the popcorn and make sure cranberries are clean and dry.
- Thread the Needle: Start by knotting one end of the thread to secure your garland.
- String the Cranberries and Popcorn: Alternate cranberries and popcorn, or create a pattern you like.
- Hang Your Garland: Once you reach your desired length, tie off the end and drape the garland on your tree or mantel.
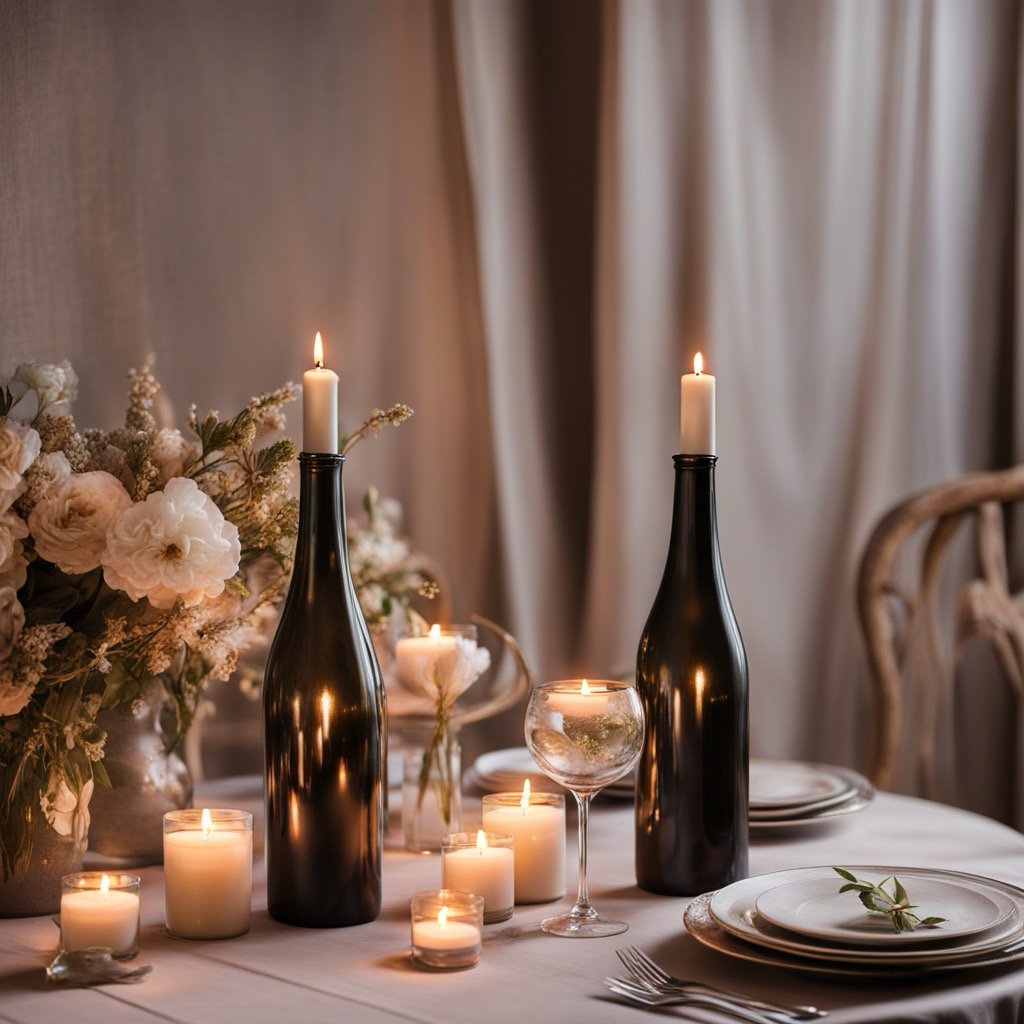
8. Upcycled Wine Bottle Candle Holders
Transform old wine bottles by painting them in festive colors, or wrapping them with twine. Place candles on top for an elegant centerpiece that’s sure to impress.
To make this DIY Decoration Idea you’ll need the following materials:
Materials:
- Empty Wine Bottles – Cleaned and dried; choose green, clear, or amber bottles for a festive look.
- Paint or Spray Paint – Festive colors like gold, silver, red, or green work well.
- Twine or Ribbon – For wrapping around the bottle necks for added texture.
- Candles – Taper candles that fit snugly in the bottle openings.
- Hot Glue Gun (Optional) – To secure the twine or ribbon.
- Decorative Accents (Optional) – Small ornaments, faux holly, or berries to attach to the bottle necks.
- Sandpaper (Optional) – To gently roughen the surface for better paint adhesion.
Instructions:
- Clean the Bottles: Ensure bottles are label-free and dry.
- Paint the Bottles: Use spray paint or acrylic paint to coat the bottles in your desired colors.
- Wrap with Twine: Secure twine or ribbon around the necks with hot glue if needed.
- Insert Candles: Place taper candles in the bottle openings.
- Add Decorative Accents: Attach small ornaments or greenery for extra charm.
9. Holiday Picture Frames
Take wooden frames or upcycle old ones by adding holiday-themed decorations like ribbons or ornaments. Insert pictures from past Christmases or artwork from your kids.
Materials Needed:
- Frames:
- Wooden picture frames (new or upcycled)
- Preparation Supplies:
- Sandpaper (if needed for old frames)
- Paint or wood stain (holiday colors like red, green, gold, or silver)
- Paintbrushes (for applying paint or stain)
- Decorative Elements:
- Ribbons (various colors and widths)
- Holiday ornaments (small baubles, bells, etc.)
- Pinecones, twigs, or artificial greenery (like pine branches)
- Glitter or sequins (for added sparkle)
- Adhesives:
- Hot glue gun (with glue sticks) or craft glue
- Double-sided tape (optional, for attaching lightweight decorations)
- Additional Supplies:
- Craft scissors (for cutting ribbons and decorations)
- Clear sealant spray (optional, for finishing touches)
- Pictures (past Christmas photos or children’s artwork)
Instructions:
- Prep the Frames:
- If you’re upcycling old frames, clean them thoroughly to remove any dust or residue.
- Use sandpaper to smooth out any rough edges or surfaces on the wooden frames.
- Paint or Stain:
- Choose your desired color (paint or stain) and apply it to the frame with a paintbrush. Allow it to dry completely.
- If using multiple colors, consider applying a base coat first and then adding accent colors or designs.
- Decorate the Frames:
- Once the paint or stain is dry, it’s time to add holiday decorations.
- Use a hot glue gun or craft glue to attach ribbons, ornaments, and other decorative elements.
- Consider layering decorations for a more dynamic look. For example, wrap ribbons around the frame or create bows to attach at the corners.
- Insert Pictures:
- Select and print out pictures from past Christmases or artwork from your kids.
- Carefully place the pictures inside the frames, ensuring they are securely fitted.
- Finishing Touches:
- If desired, spray a clear sealant over the decorated frames to protect them from wear and tear.
- Let everything dry completely before displaying.
- Display or Gift:
- Find a special place to display your holiday picture frames.
- Alternatively, consider giving them as thoughtful, personalized gifts to family and friends.
Tips:
- For a cohesive look, stick to a color palette that complements your holiday decor.
- Get creative with the arrangement of decorations; there’s no right or wrong way to make it festive!
- You can also add a small plaque or tag to each frame with the date or a holiday greeting.

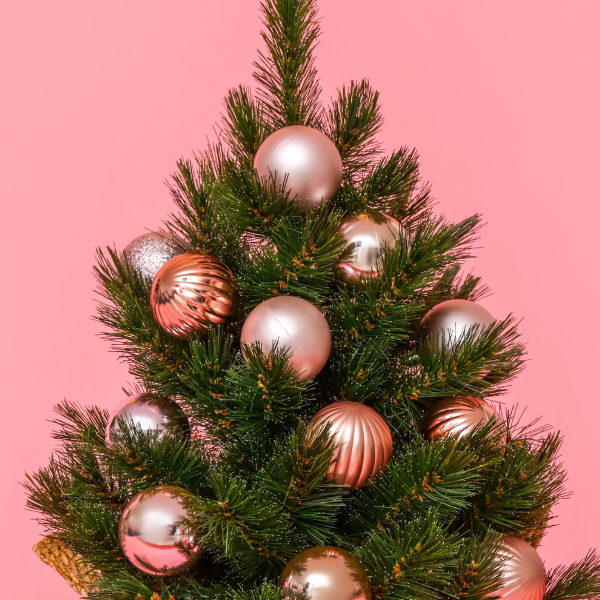
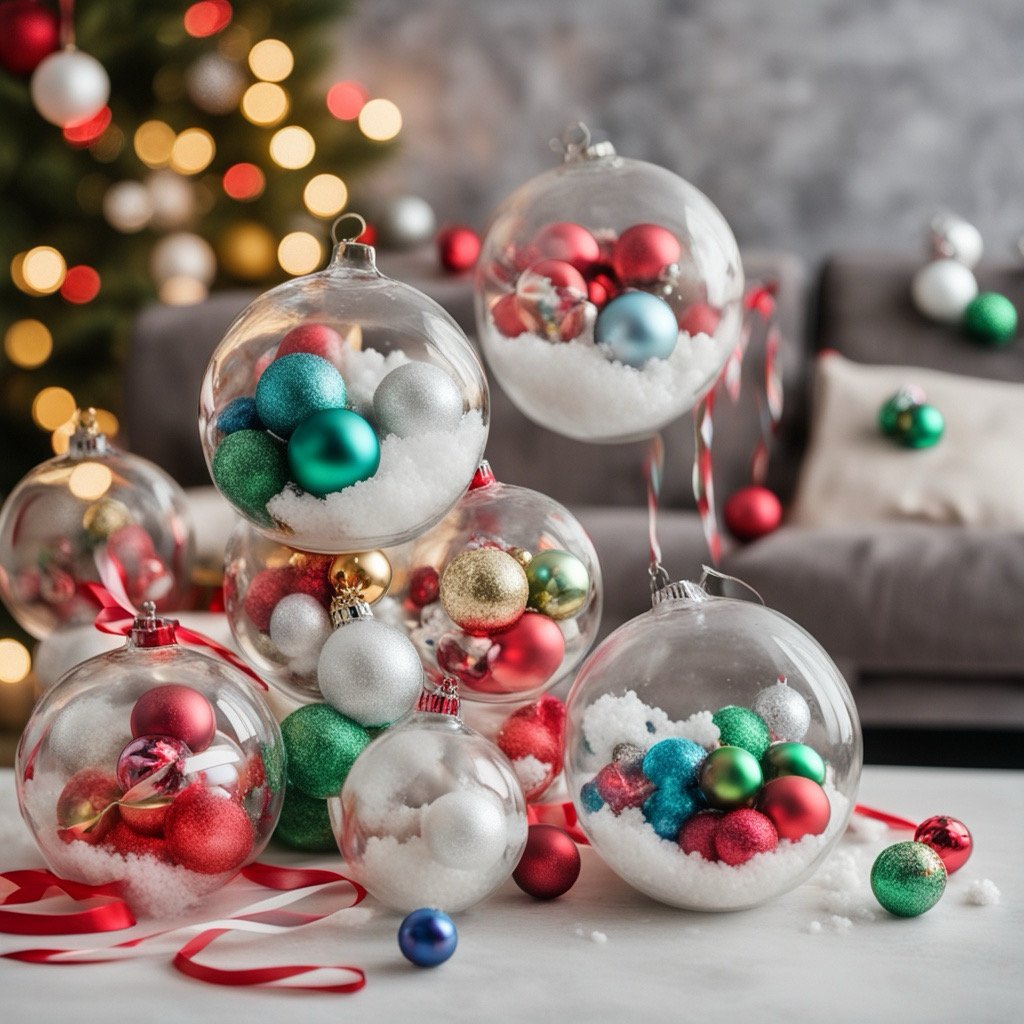
10.Christmas Ornaments
To make this DIY Decoration Idea you’ll need the following materials:
Materials Needed:
– Clear plastic or glass ornaments
– Fake snow or glitter
– Ribbon or twine
– Number stickers or paint
– Small treats or notes
Instructions:
1. Open each ornament and fill it with fake snow or glitter.
2. Add small treats or handwritten notes inside each one for a surprise.
3. Close the ornaments securely.
4. Attach a ribbon or twine to hang them.
5. Label each ornament with numbers 1 to 10 using stickers or paint.
6. Hang them on a festive tree or string them in a garland.
Creating these DIY decorations Ideas is a wonderful way to get into the Christmas spirit, and they’ll bring joy to your home.
Share your creations on social media and inspire others to craft their own festive decorations! Happy crafting!